Getting Started
This page builds a first workflow in about ten minutes. It starts from a webhook, filters the incoming data and stores it in a table, so no other product is needed. Every workflow has a trigger that starts it, followed by actions.
1. Create a table for the data
The example stores orders in a table. Open Tables in the left navigation and create a table with a Customer name field of type string and a Balance field of type double. Tables explains each step.
2. Create the workflow
- Open Workflows in the left navigation.
- Click Create new workflow (or New workflow when the folder already has workflows).
- Type a Workflow Name and click Create.
The editor opens. The trigger box reads Choose an app to trigger the workflow.
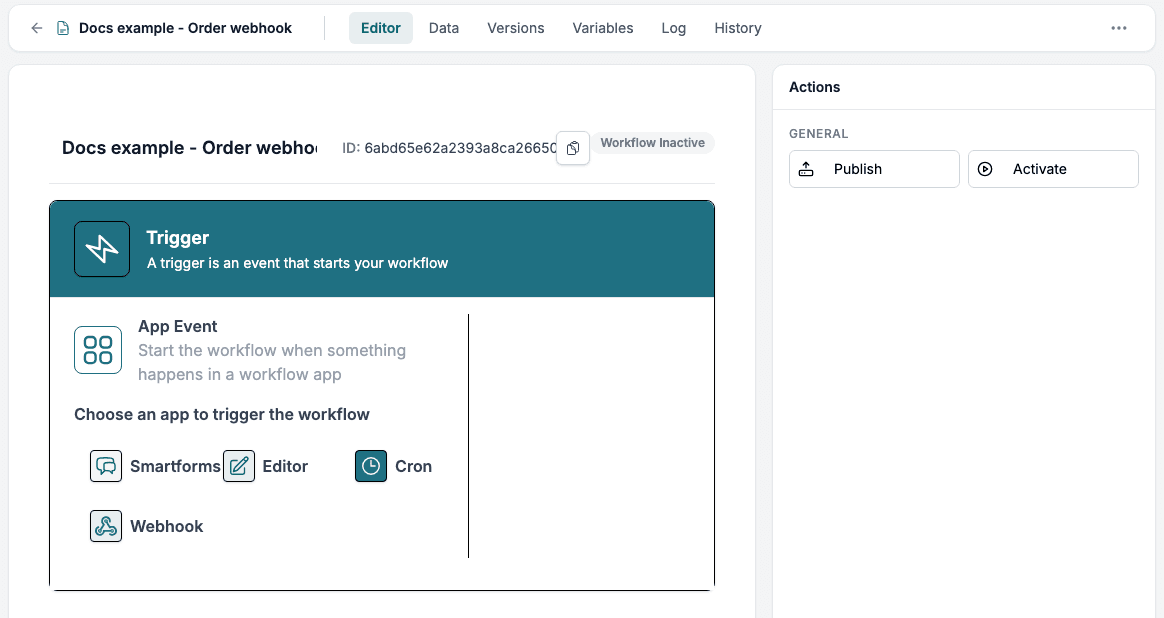
3. Choose the trigger
- Click Webhook.
- In Trigger Event, choose Catch Hook. Setup Trigger opens.
- Copy the Development URL with Copy. Each environment has its own URL.
- Send a request to the URL, for example from a terminal:
curl -X POST "https://api.workflow.metaforce.net/Webhook/Catch/<your key>" \
-H "Content-Type: application/json" \
-d '{"customer": {"name": "Kari Nordmann", "email": "kari.nordmann@example.com"}, "amount": 1250.5}'- Click Test Trigger. The result is Test Successfull and the data of your request is listed. Nested values get dotted names such as
customer.name.
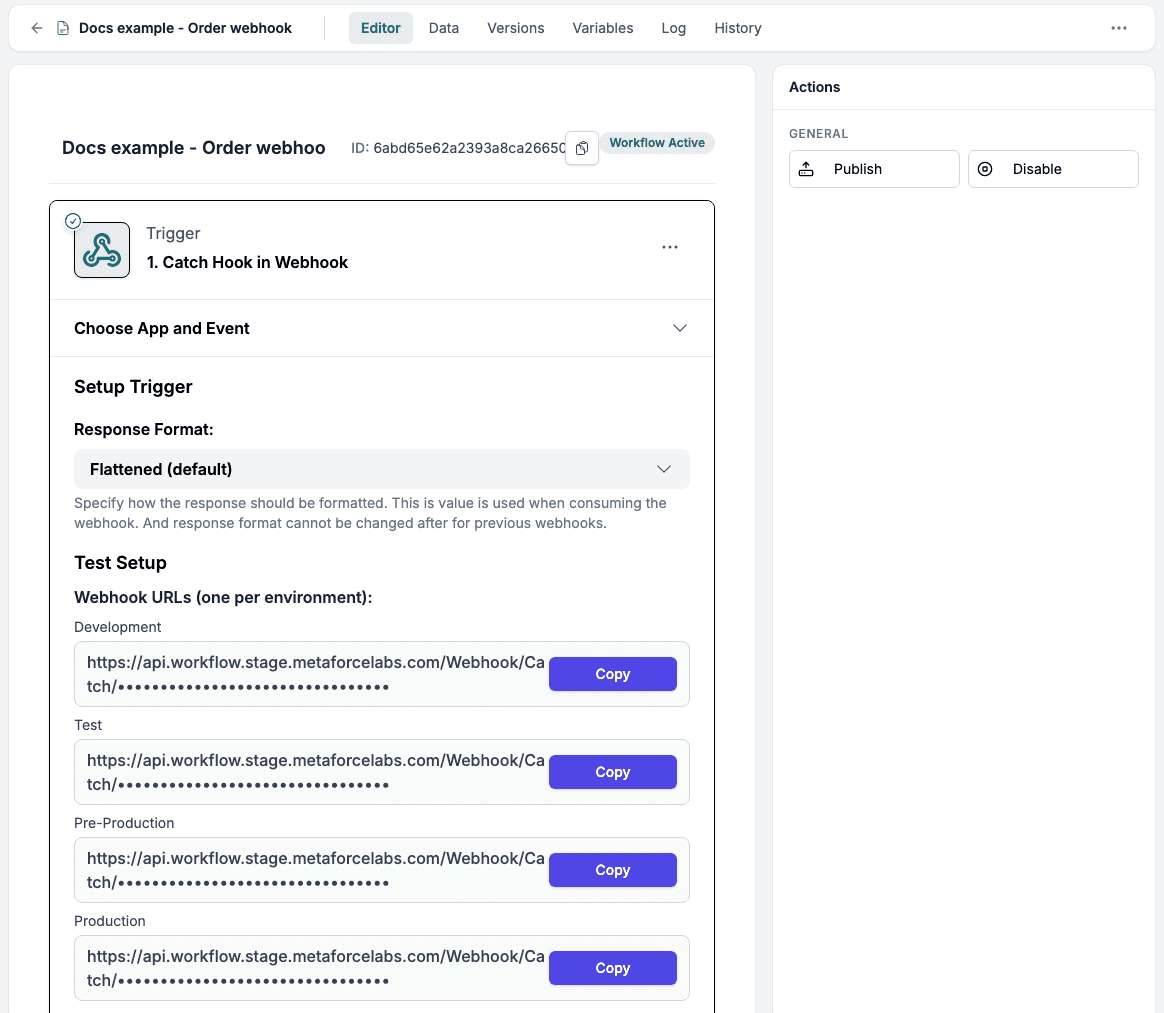
See Triggers for all trigger types.
4. Add actions
- Click the plus button under the trigger.
- In Choose an app, click Tables.
- In Action Event, choose Insert record.
- In Setup Action, choose your table. Tick Customer name and click its field. The list of values from earlier steps opens. Pick 1. customer.name. Do the same for Balance with 1. amount.
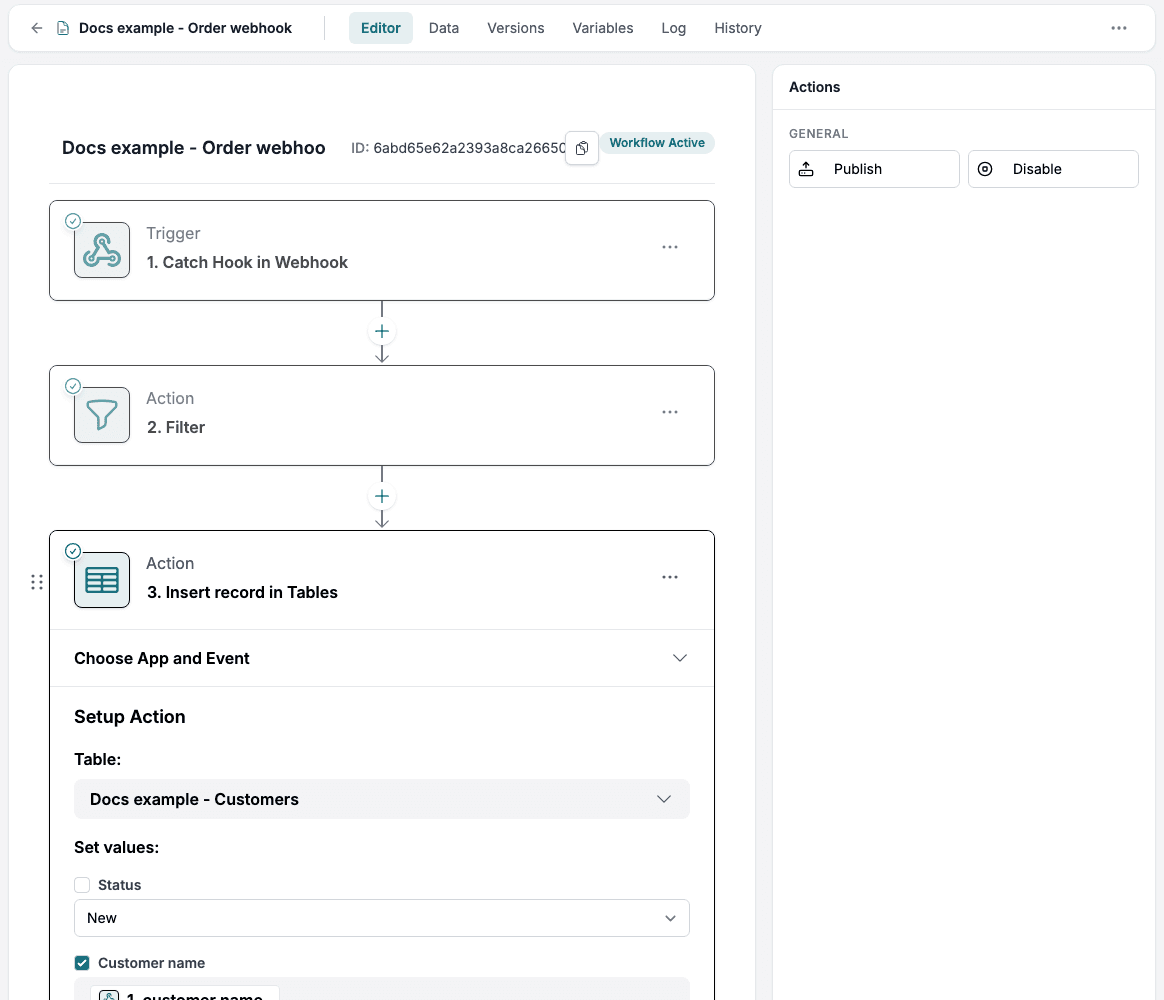
To stop bad data before it is stored, add an Only continue if condition is met. step between the trigger and the table action. See Conditions and Loops.
5. Publish and activate
- Click Publish in the Actions panel on the right. Your changes are saved as a draft while you work. Publish makes them the Development version. If you do not see the panel, make the browser window wider.
- Click Activate. Workflow checks the steps first. If a step has an error, the workflow is not activated and the step is marked. A workflow with warnings asks for confirmation before it activates.
The badge at the top changes from Workflow Inactive to Workflow Active. The Editor page describes the screen in detail.
6. Check the run
Send the request again. Open the History tab. The run is listed with its status and the number of tasks. Open it to see the data each step received and returned. The table’s Data tab shows the stored record. See Run history and Data.
Example: look up company information
A Smartform asks for a company registration number. A workflow can:
- Start when the value of that field changes (trigger Smartforms, event Element Value Change).
- Call a REST API with the number (action REST API, event GET).
- Write the company name and other data back into the Smartform (action Smartforms, event Update Values).
The REST API action page shows how to set up the call and test it.