Tables
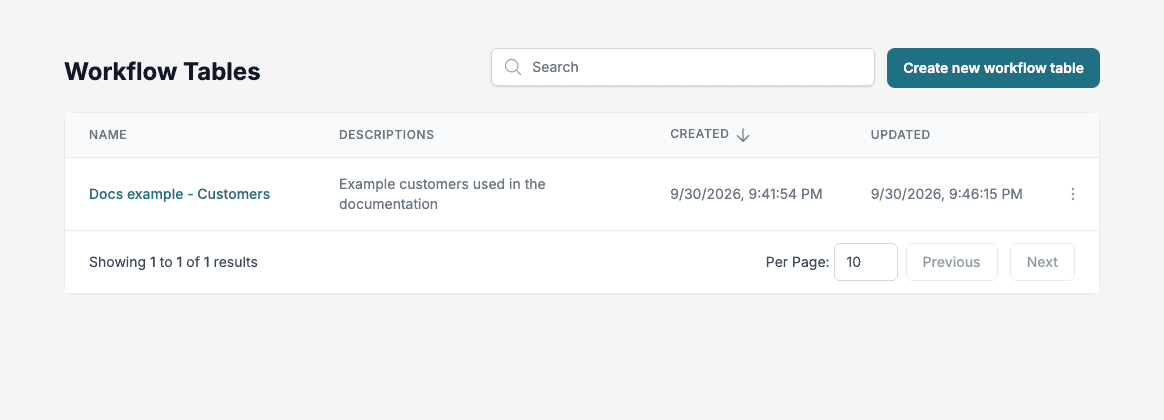
Tables store data that workflows read and write, for example customers or orders. Open Tables in the left navigation. The screen is titled Workflow Tables.
The table list
The list shows Name, Descriptions, Created and Updated of each table. Use Search to filter it. Click a table name to open its structure. The menu at the end of a row has Delete, which asks “Are you sure you want to delete table” followed by the table name, and warns that the action cannot be undone.
Create a table
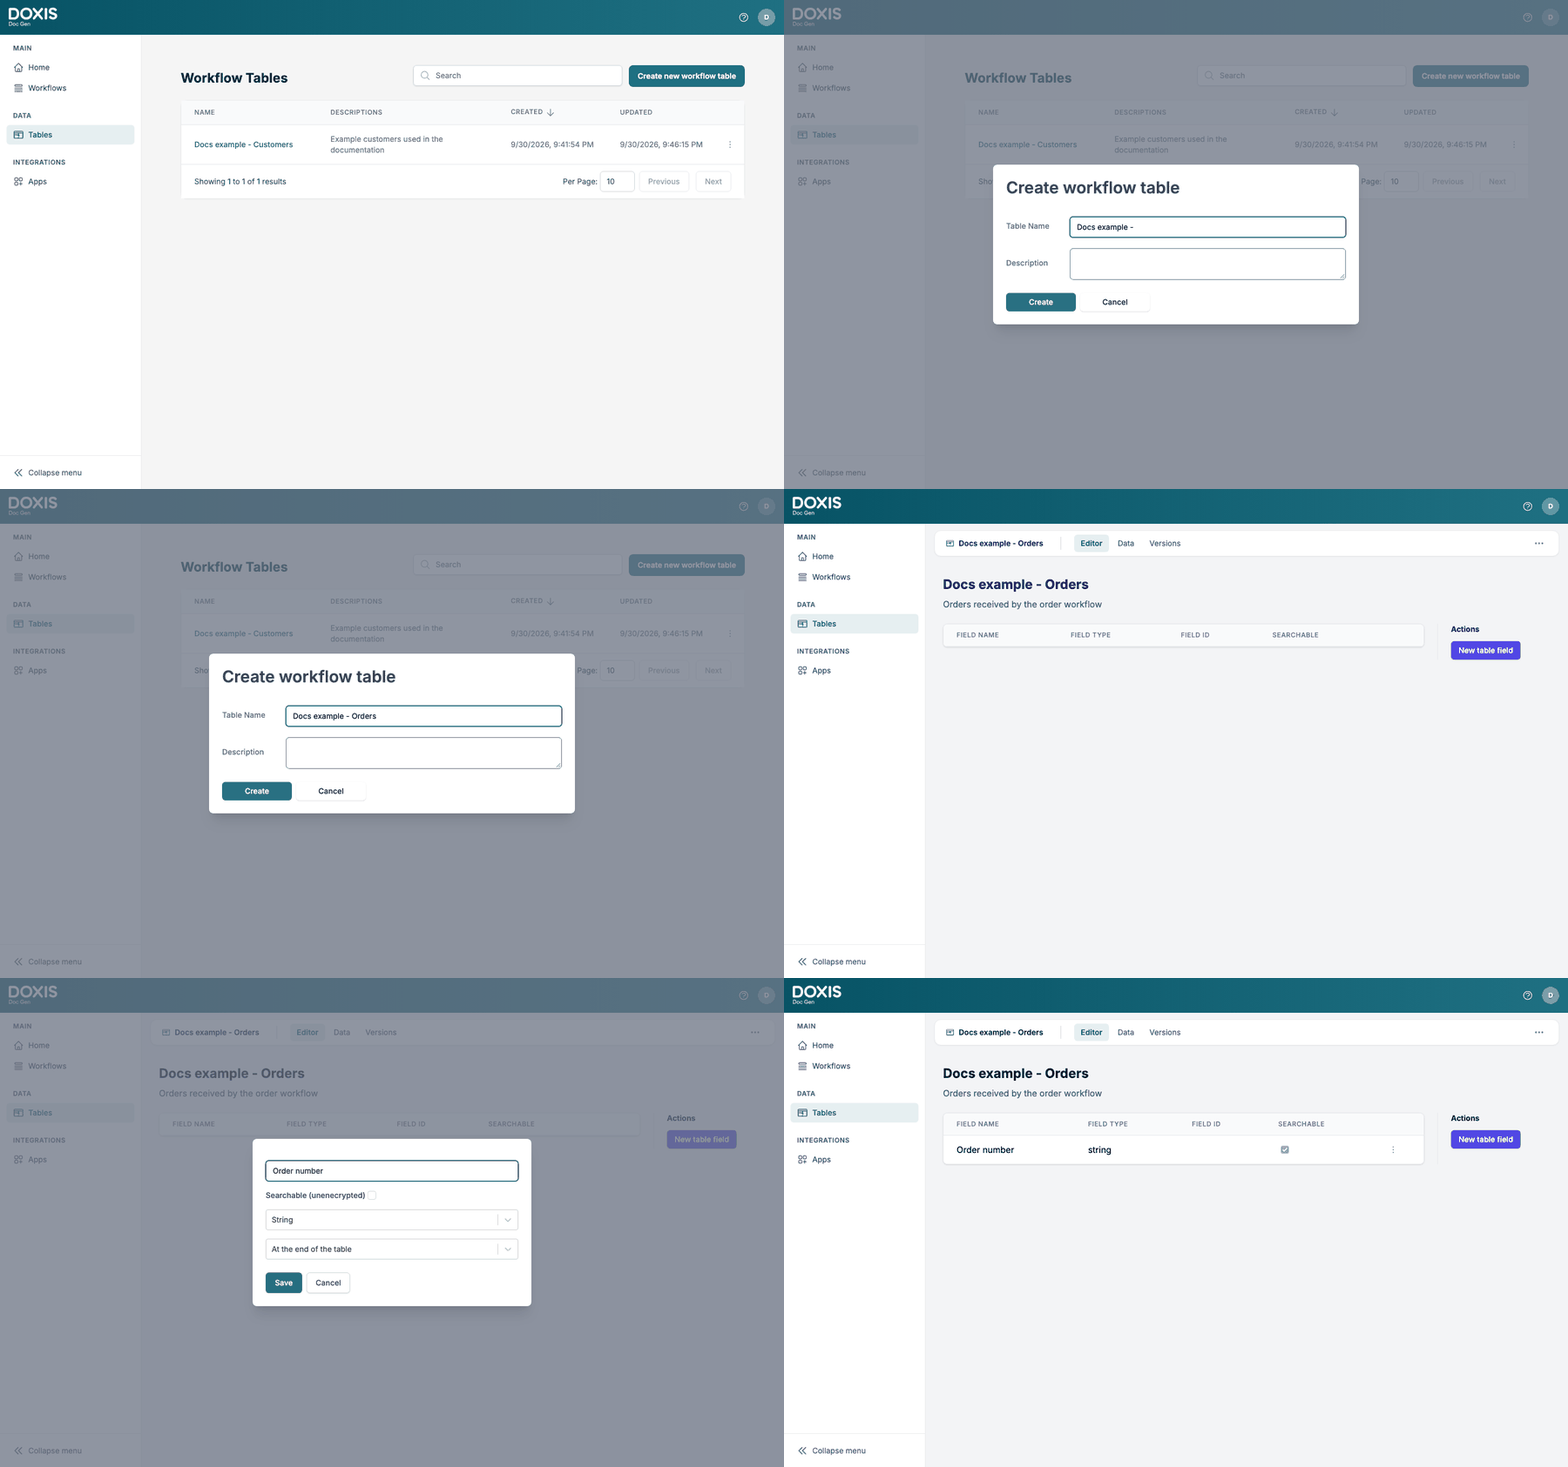
- Click Create new workflow table.
- Type a Table Name and a Description.
- Click Create. The structure page opens so you can add fields.
The table tabs
A table has three tabs at the top: Editor (the structure), Data and Versions.
The table header
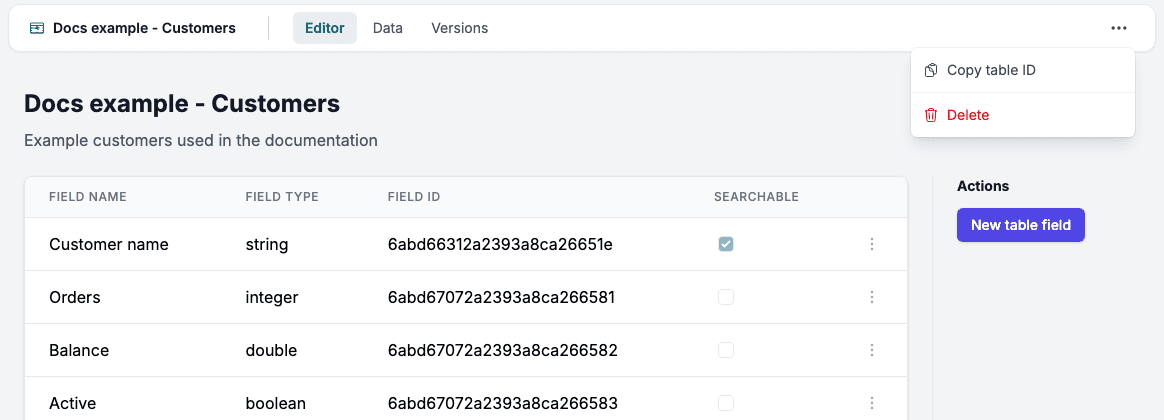
The bar with the tabs also shows the name of the table on the left and the Table actions menu (three dots) on the right. It is the same on all three tabs. The Editor tab also shows the name and description as its heading.
- To rename the table, click its name in the bar, type the new name and press Enter. Press Escape to keep the old name.
- The Table actions menu has Copy table ID and Delete.
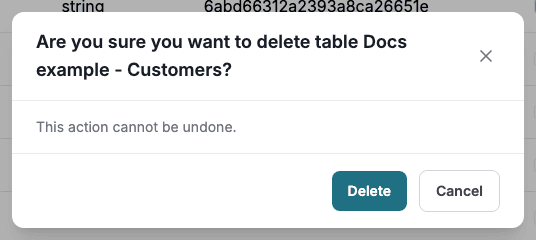
- Delete asks “Are you sure you want to delete table” followed by the table name, with the text “This action cannot be undone.” Click Delete to remove the table or Cancel to keep it. It does the same as Delete in the row menu of the list.
Editor: fields
The Editor tab lists the fields of the table with Field name, Field type, Field Id and Searchable.
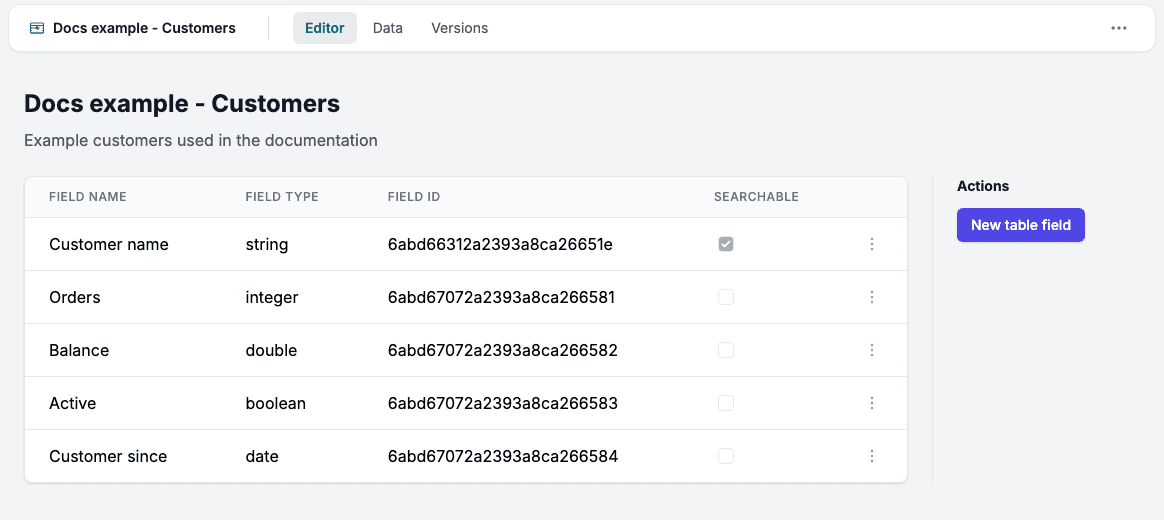
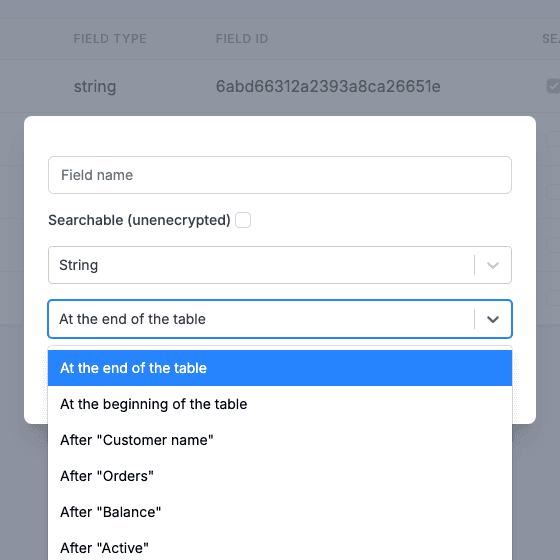
Click New table field to add a field. In the dialog:
- Type the Field name. A name can be used only once in a table. Workflow refuses a second field with the same name and says Field name already exists.
- Tick Searchable (unenecrypted) if workflows and the Data tab need to search this field. Searchable values are stored unencrypted. Use it only where a fast lookup is needed. The product spells this label as shown.
- Choose the type: string, integer, double, boolean or date.
- Choose the position: At the end of the table, At the beginning of the table or after any existing field.
- Click Save.
The menu at the end of a field row has Delete. It removes the field at once, without asking for confirmation.
Data
The Data tab lists the records, with your fields plus Status, Retries, Created and Updated.
To filter, click Add filter, choose a Field Name (the searchable fields, Status and Retries), choose a Type and type a Value. The type offers Equals and Contains for text, Equals, Less Than, Less Than Or Equal, Greater Than and Greater Than Or Equal for numbers and dates, and Equals for true or false fields and Status. Click Apply filters. Use the bin icon to remove a filter row.
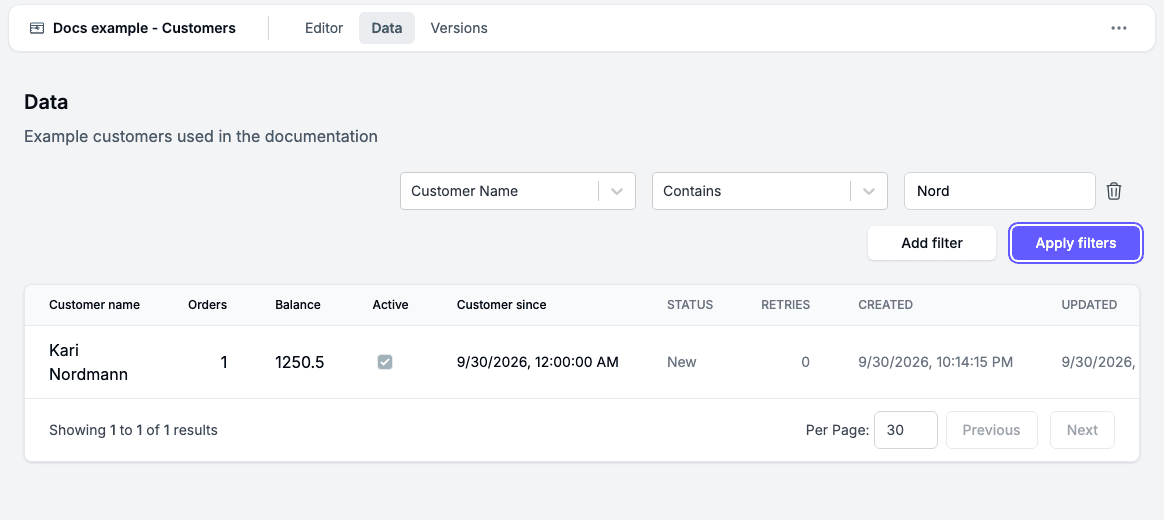
The menu at the end of a row has View Record, which shows every value of the record, including Id, Status, Retries, Created and Updated, and Delete.
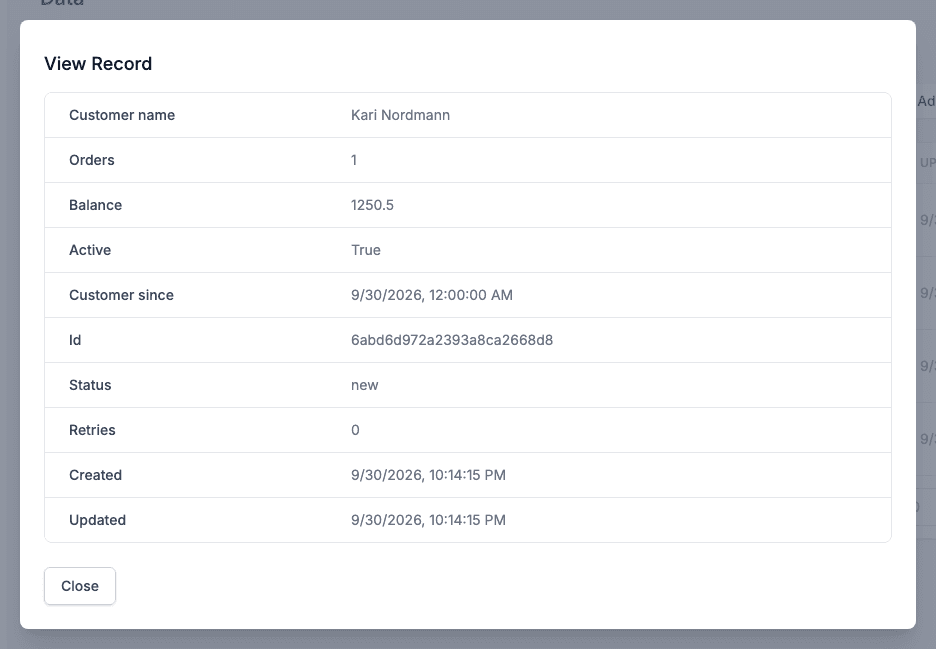
Text longer than 50 characters is shortened in the list. Point at the value to see all of it, or open View Record. Delete on a record row removes the record at once, without asking for confirmation.
Versions
Tables use the same environments as workflows: Development, Test, Pre Production and Production. The Versions tab shows the latest version in each environment with Records, Created and Environment. Tick an environment at the top to also list its older versions. Data opens the records of that version. Promote to copies the table definition to the next environment. Rollback removes the latest version in Test, Pre Production or Production. The Development version cannot be rolled back.
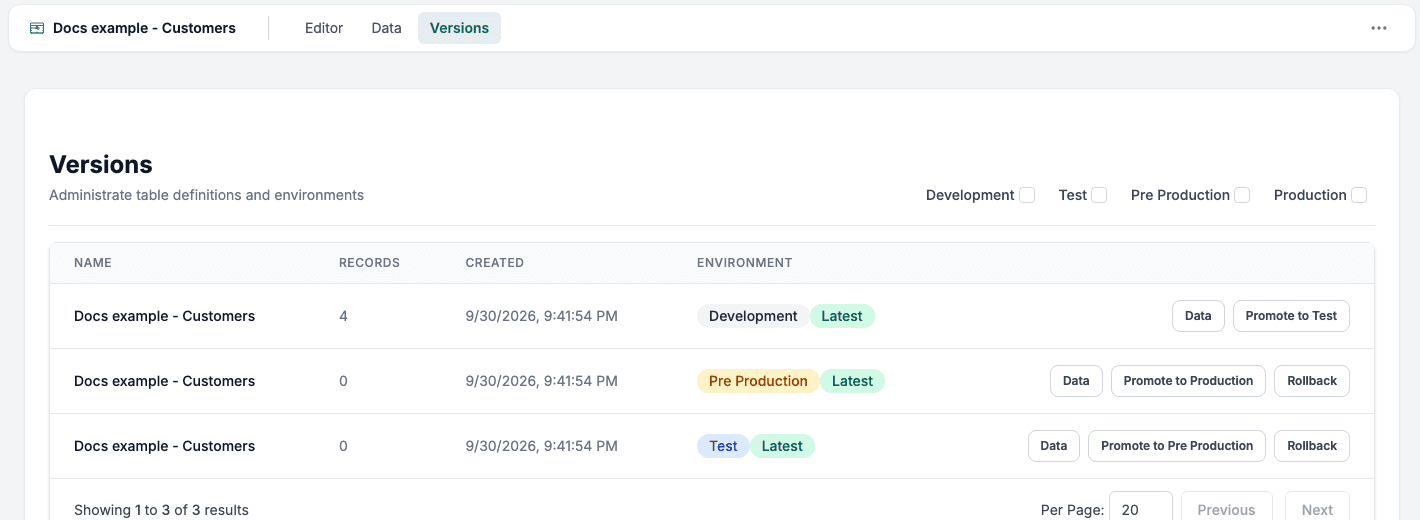
When a version holds records, the rollback confirmation warns: “This table version has N records. Confirming rollback will delete this version’s table data.”
Note: A workflow can be promoted to an environment only when the tables its steps use are already promoted there, with the fields the steps use. Otherwise Workflow refuses the promotion and names the step and the table.
Using a table in a workflow
Add an action with the Tables app, choose an Action Event and pick your table. The nine actions are described on Tables Actions.