Resources
The Resources screen in Templates lets you upload and manage images that can be reused inside Smartforms. A resource can be used as an image inside a Resource element or as a background image for a section.
A Smartform points at the image instead of holding its own copy. When you replace the image in a resource, every Smartform that uses it shows the new image.
The Resources screen
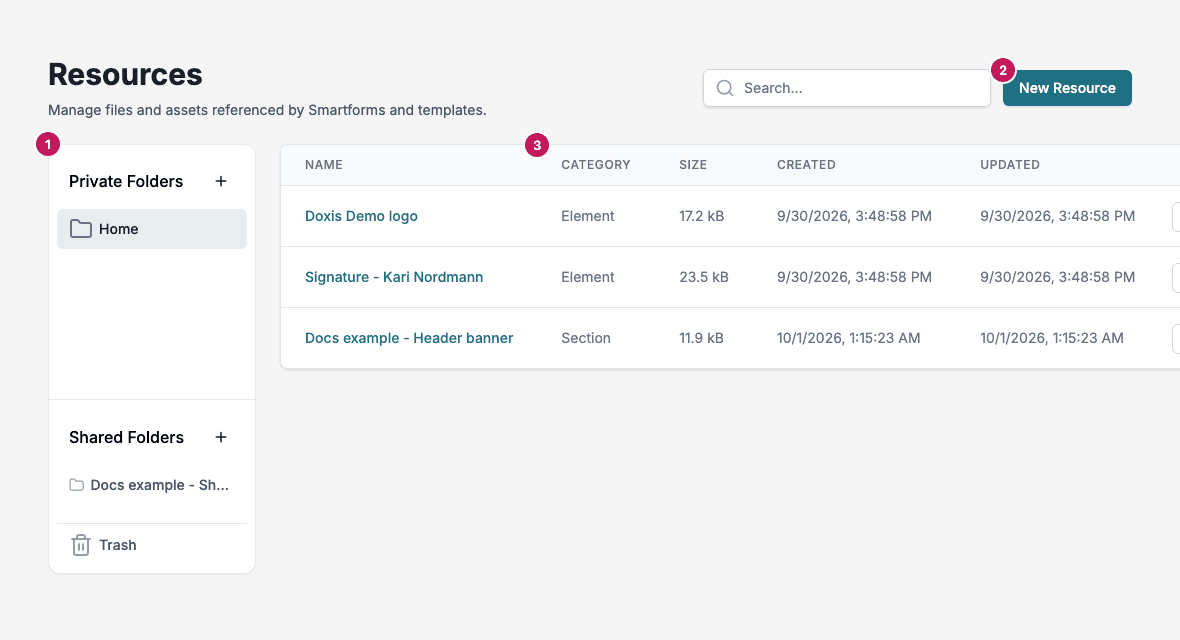
- The folder panel. Home shows only the resources you created. A shared folder shows every resource in it. See Folders.
- New Resource.
- The list: Name, Category, Size, Created and Updated. Use Search to find a resource by name. Click a name to open the image.
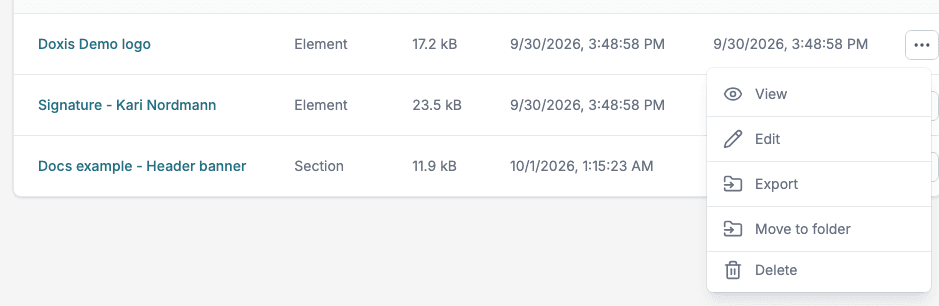
The menu button at the end of each row has View, Edit, Export, Move to folder and Delete.
Create a resource
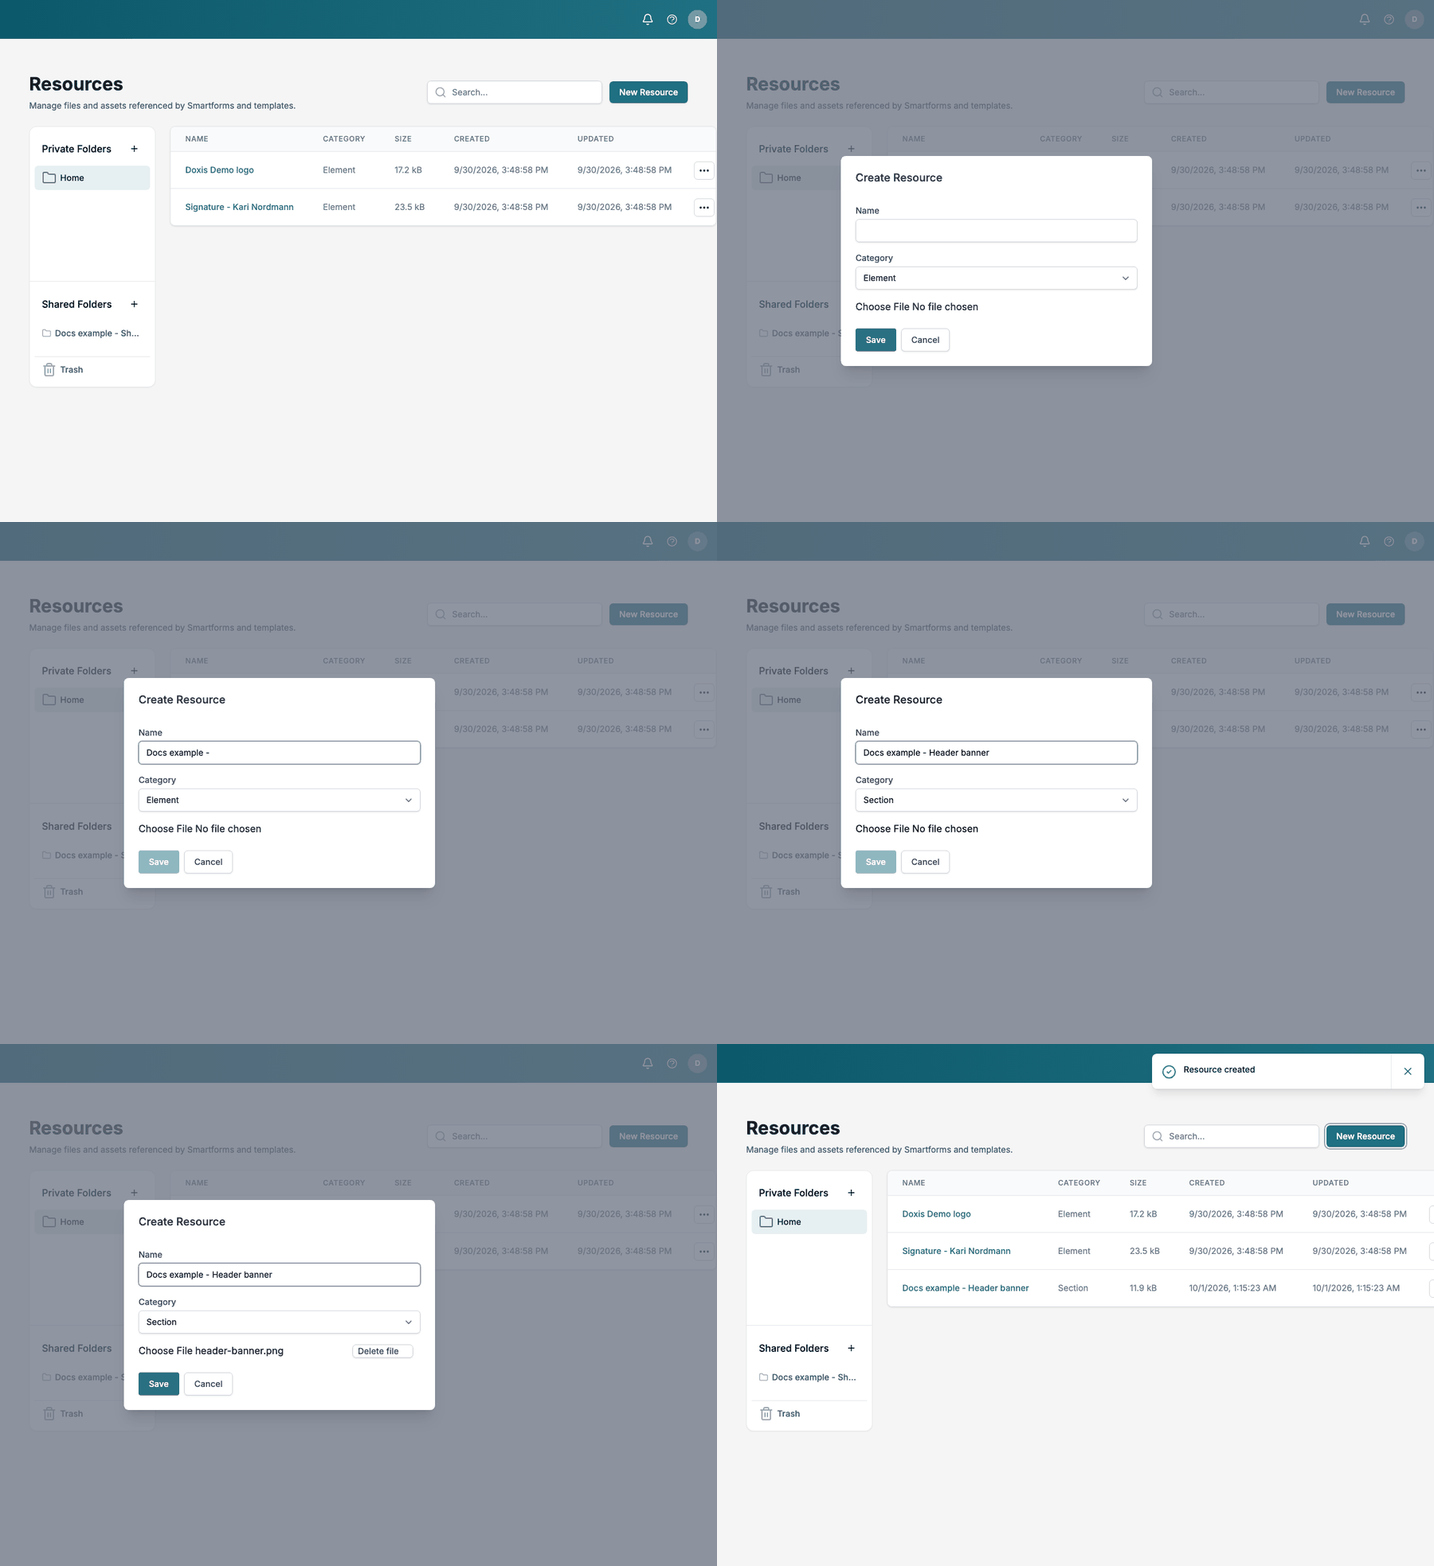
- Go to Templates → Resources.
- Click New Resource. The window is called Create Resource.
- Fill in the fields:
- Name: A descriptive name for the resource (e.g.,
Company Logo,Header Background). - Category: Element if you will use the image in a Resource element, or Section if you will use it as a section background.
- Choose File: Upload the image file.
- Name: A descriptive name for the resource (e.g.,
- Click Save.
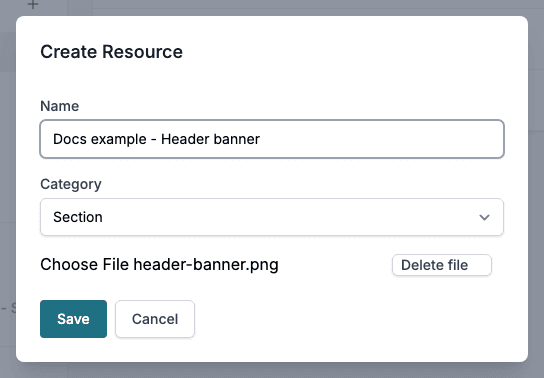
Save stays grey until the name and a valid file are there.
- The file must be an image: png, jpg, jpeg, gif, bmp, webp, tiff, svg, ico, jfif, pjpeg or pjp.
- The file can be at most 500 kB.
The resource is put in the folder you are viewing. In Home it is yours until you move it to a shared folder.
Using a resource in a Smartform
Once a resource exists, you can use it in a Smartform in two ways. The category decides where a resource is offered.
1. Add as a Resource element
- Insert a Resource element into your Smartform.
- Select the element.
- In the properties panel, choose the Resource from the list. The list offers resources with the category Element.
2. Set as Section Background
- Select the Section where you want to apply a background image.
- Open the properties panel for that section.
- Under Background Resource, choose the image. The list offers resources with the category Section.
A resource you make from inside the designer is put in Home.
Change a resource
- Open the row menu of the resource and click Edit.
- If Smartforms use the resource, Studio first shows This resource is in use with the Smartforms that use it. Click Continue to go on, or Cancel to stop.
- In the Edit Resource window, change the Name, the Category or the file, and click Save. You do not need to choose a file again if you only change the name.
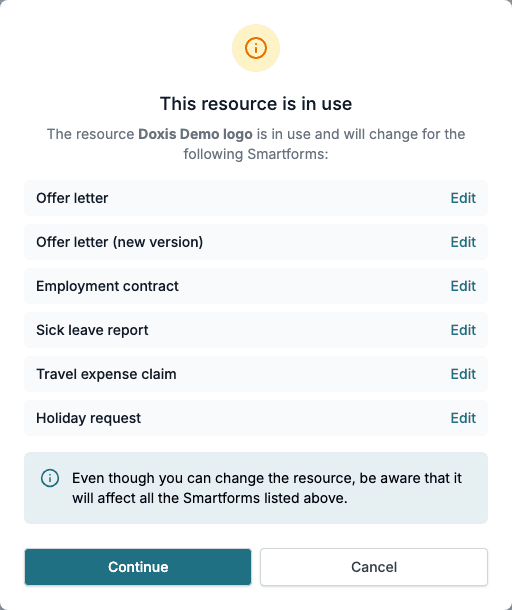
A new file replaces the image in every Smartform that uses the resource, so check the list before you continue. Each Smartform in the list has an Edit link that opens it in the designer.
Other actions
- View opens the image.
- Export downloads a JSON file with the resource and its image, for use in a Doxis package. See Doxis packages.
- Move to folder moves the resource to another folder.
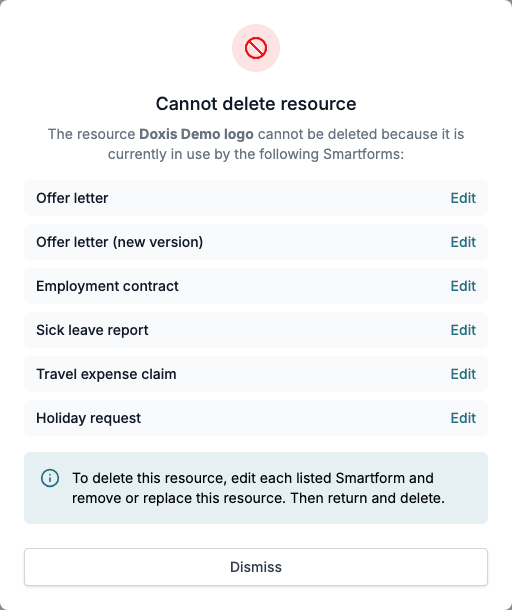
- Delete asks Do you want to delete the resource. If a Smartform uses it, Studio refuses with Cannot delete resource and lists the Smartforms with an Edit link. Remove or replace the resource in each of them, then delete it.
Best Practices
- Use meaningful names for resources (e.g.,
HeroBanner,FooterBackground) to make them easier to find later. - Optimize images so they stay under the 500 kB limit and load quickly.
- Choose the category that matches where you will use the image, so it shows up in the right list.
- Reuse uploaded images instead of uploading duplicates to keep the library clean.