Data Load (import from CSV)
Data Load creates many Smartforms at once from a CSV file. Each row in the file becomes one form, already filled in with the values from the row. You can then send each form to its recipient by e-mail. Use it, for example, to send a prepared form to a list of employees.
Data Load needs the data license for your company. There is no menu item for it in Studio, so you open it by its address: https://smartforms.metaforce.net/admin/dataload. The address follows the environment you choose here:
The steps below follow the example of a travel request form that is filled in for five employees.
Import a CSV file
- Open Smartform Dataloader. The list Available Smartforms for dataload shows the active Smartforms, each with the state Published or Draft. Click the name of the Smartform to load data into.
- Click Generate Template. A file named after the form is downloaded, for example
Docs example - Travel request-dataload-template.csv. It holds one header row. - Fill in the file, as described in The CSV file.
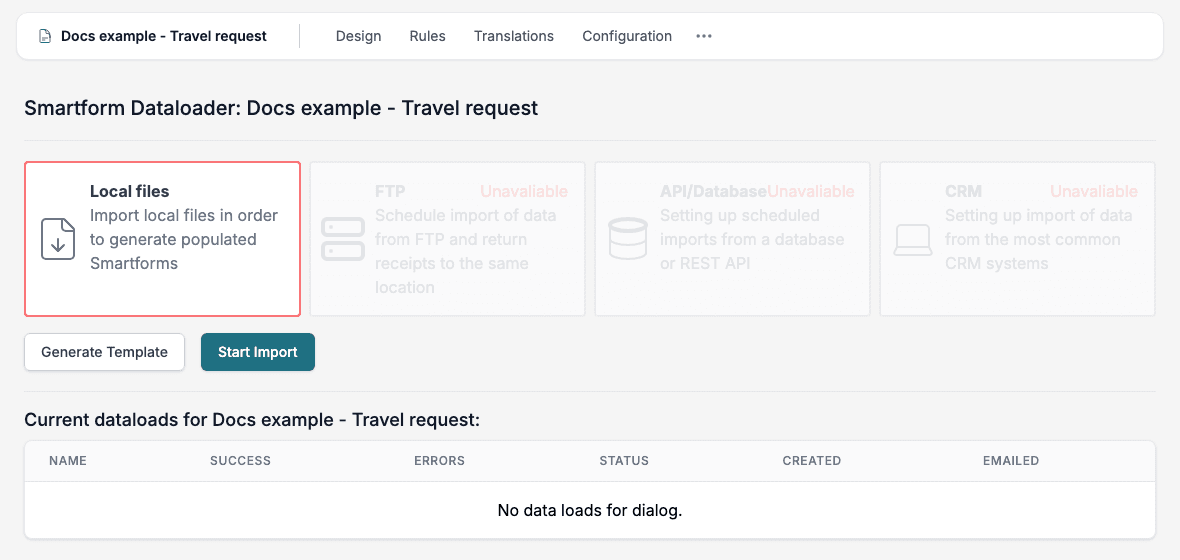
- Click Start Import. Local files is the option to use.
- Type a Data Load Name.
- Click Upload a file, or drag the file into the box. Only
.csvfiles are accepted. - Read Import details. The Status bar shows Ready when the file can be imported. Click Import.
- On Generate dialogs for:, click Generate. The status changes from Generating… to Generated.
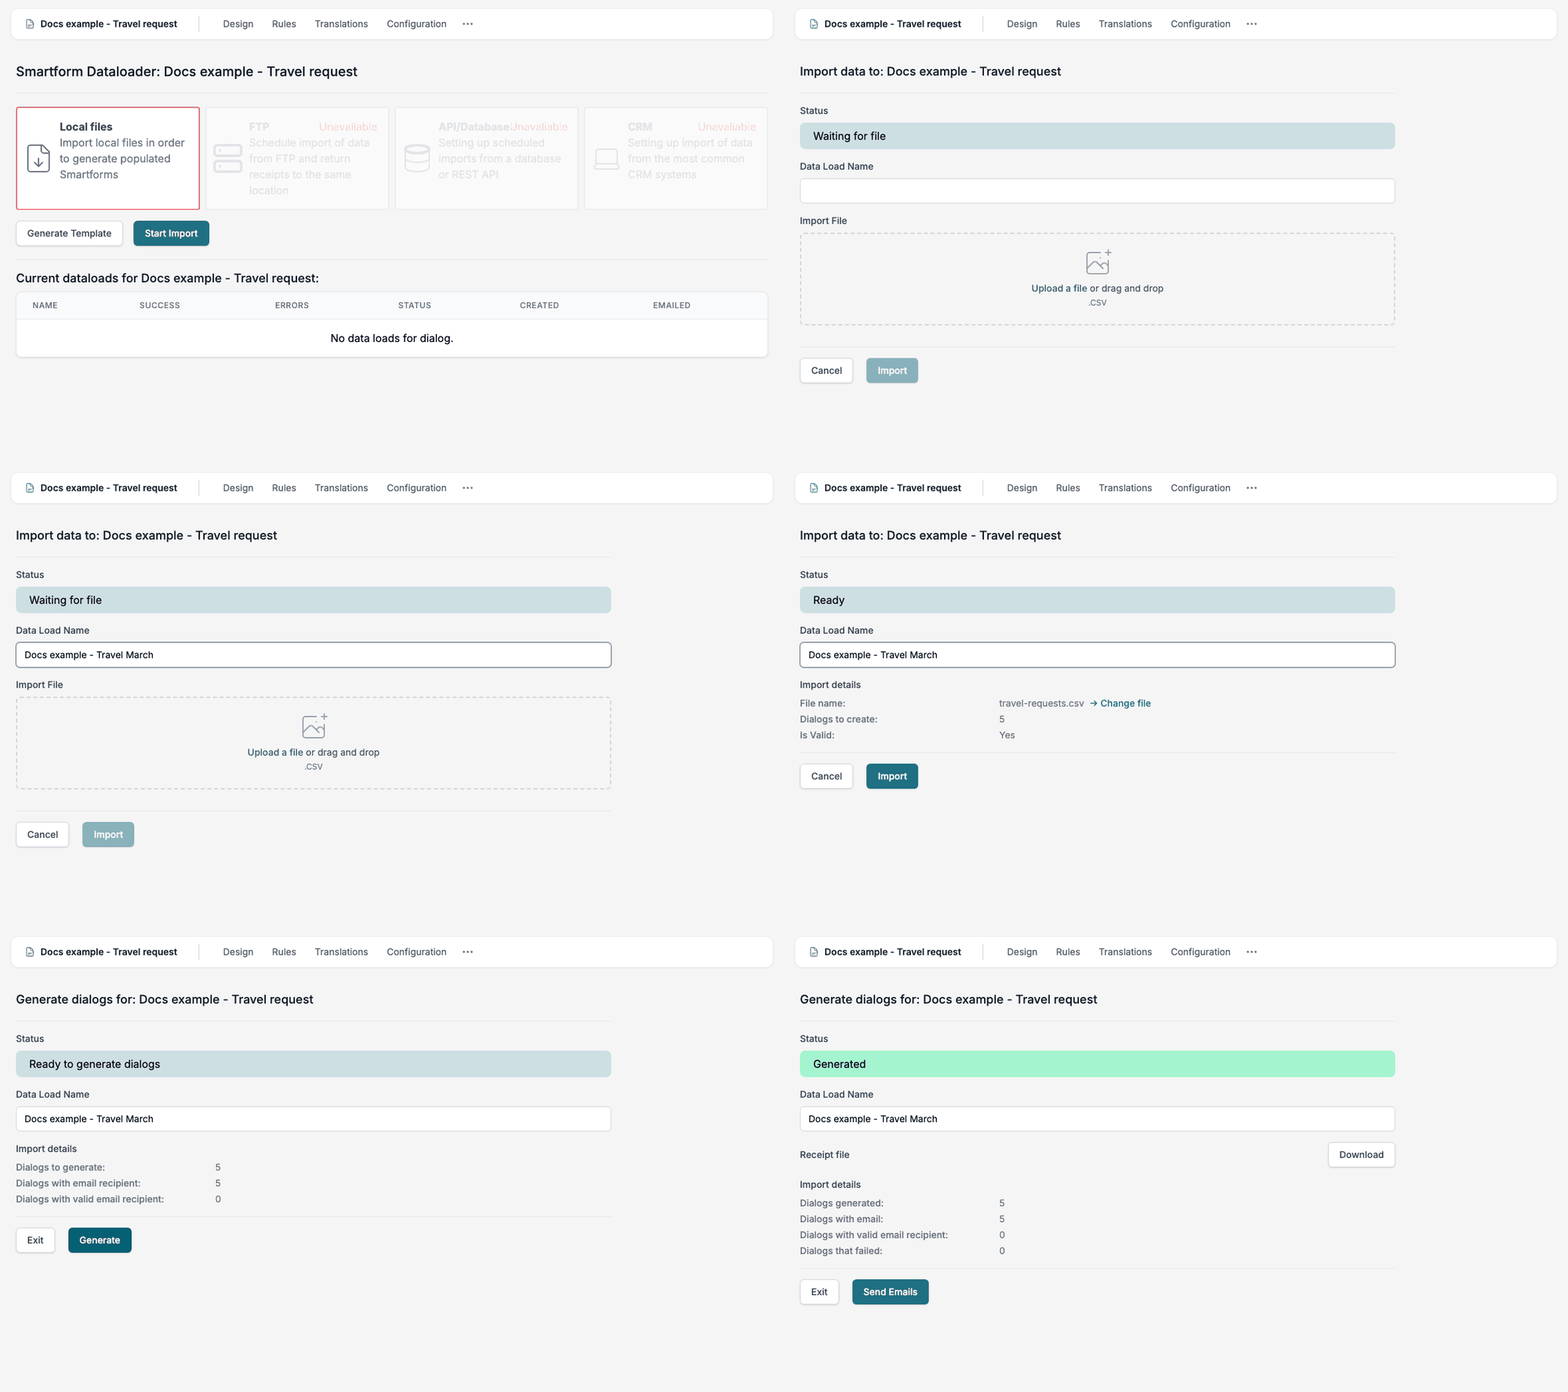
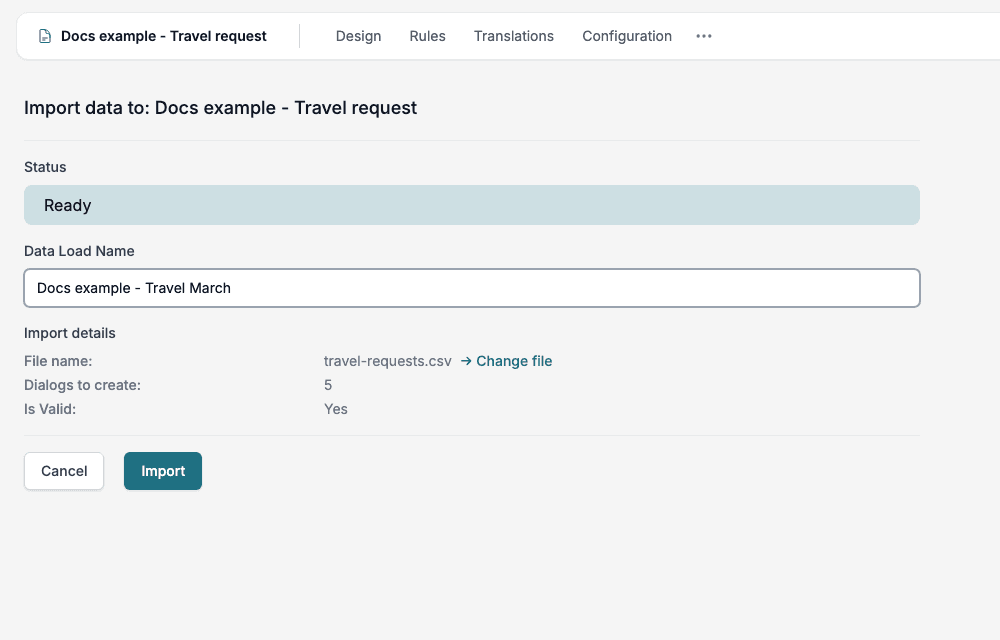
Import details shows:
| Line | Meaning |
|---|---|
| File name | The file you uploaded. Change file replaces it. |
| Dialogs to create | The number of rows in the file, that is, how many forms will be created. |
| Is Valid | Yes when the file can be imported. |
| Errors | What is wrong, when Is Valid is No. |
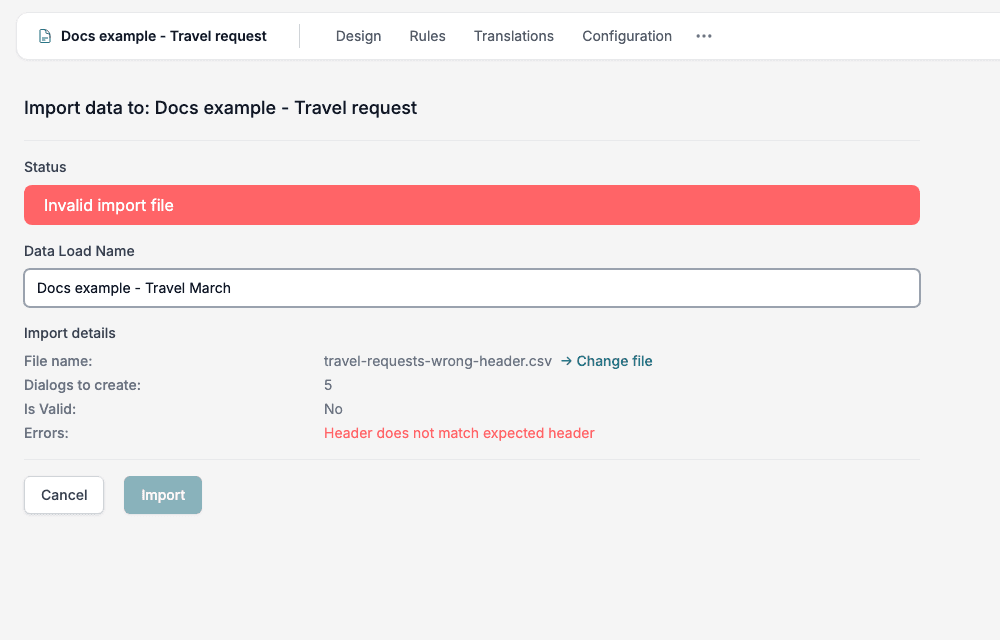
The Import button is available only when the file is valid and the data load has a name. Step 7 creates the data load and does not create any form yet. The forms are created in step 8.
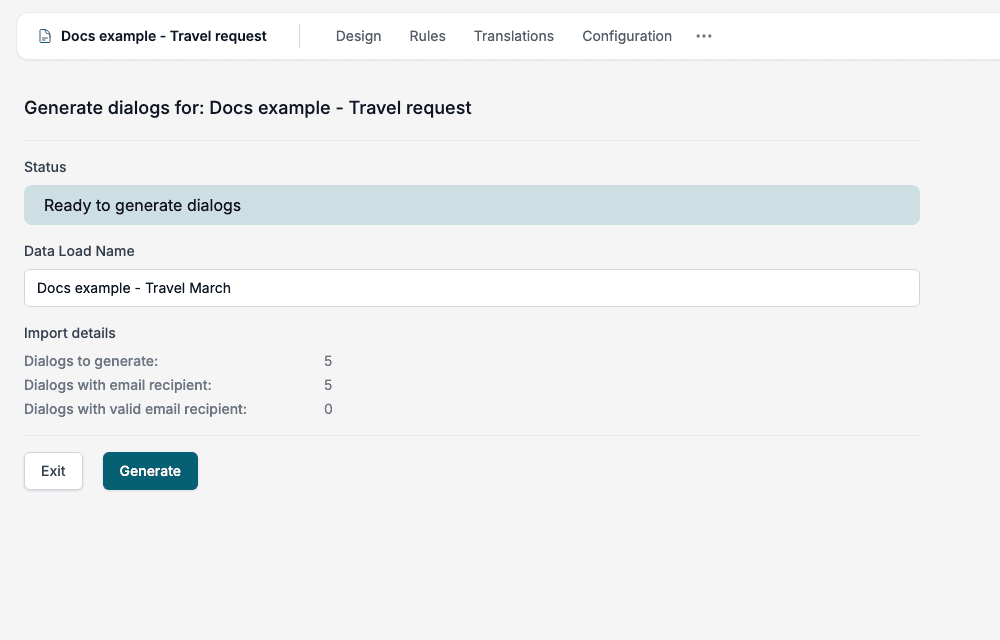
When the forms are created, the page shows the status Generated and a receipt.
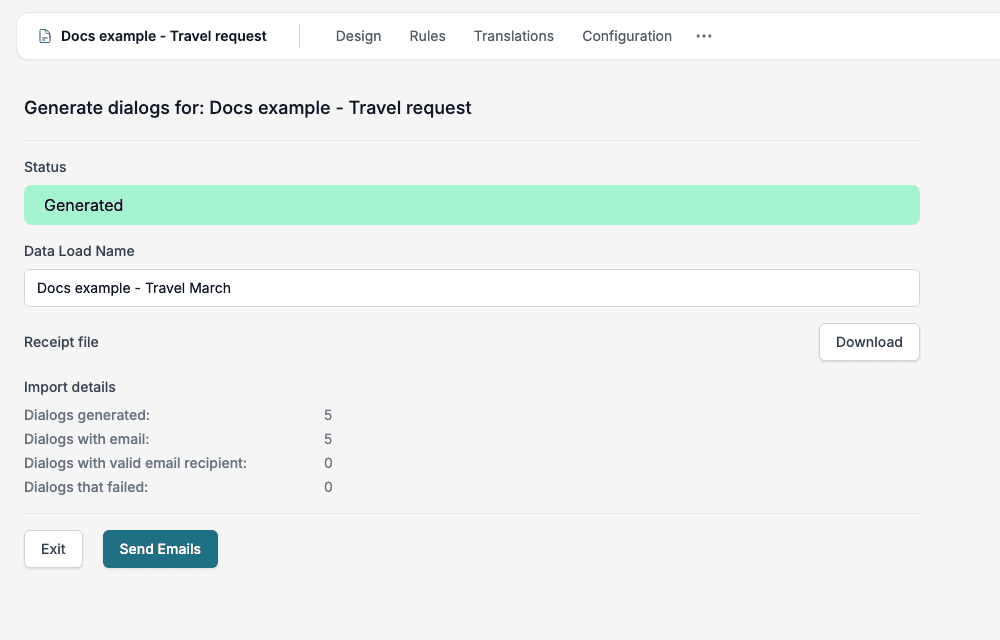
- Download saves the receipt file.
- Dialogs generated is the number of forms created, and Dialogs that failed the number that could not be created.
- Dialogs with valid email recipient counts the rows whose recipient column holds a valid e-mail address.
Each new form is added to the Records of the Smartform, with the status In progress. See Records.
The CSV file
The template has a column for every property of the Smartform, in the order of the form, and a last column named recipient.
formTitle,introText,travellerName,workEmail,startDate,endDate,needsAccommodation,hotelName,expenseDescription,expenseAmount,receipts,submitButton,recipient
Travel request,,Kari Nordmann,kari.nordmann@example.com,2026-11-16,2026-11-18,false,,,,,,- Do not change the header row. It must be exactly the header of the template, or the file is refused.
- Every row must have the same number of columns as the header. Leave a cell empty when there is no value.
- Write dates as in the example, year, month and day.
- The recipient column holds the e-mail address that Send Emails uses. Leave it empty when a row has no recipient.
- Do not use commas, semicolons or vertical bars inside a value. The browser treats all three as column separators when it reads the file.
Limits and messages
A file can hold up to 50,000 rows of data, not counting the header row, and the upload can be up to 50 MB. For more rows, split the file and import each part on its own.
| Message | Cause | What to do |
|---|---|---|
| Header does not match expected header | The first row differs from the template. | Download the template again and use its header row. |
| No data lines | The file has only a header row. | Add rows. |
| One or more lines did not have the correct number of columns | A row has more or fewer values than the header. | Check the commas in the row. |
| No content | The file is empty. | Choose the right file. |
| The file has more than 50000 data rows. Split it and import each part separately. | There are too many rows. | Split the file. |
Send the forms by e-mail
After Generated, the receipt page has a Send Emails button. It opens Issue Notifications.
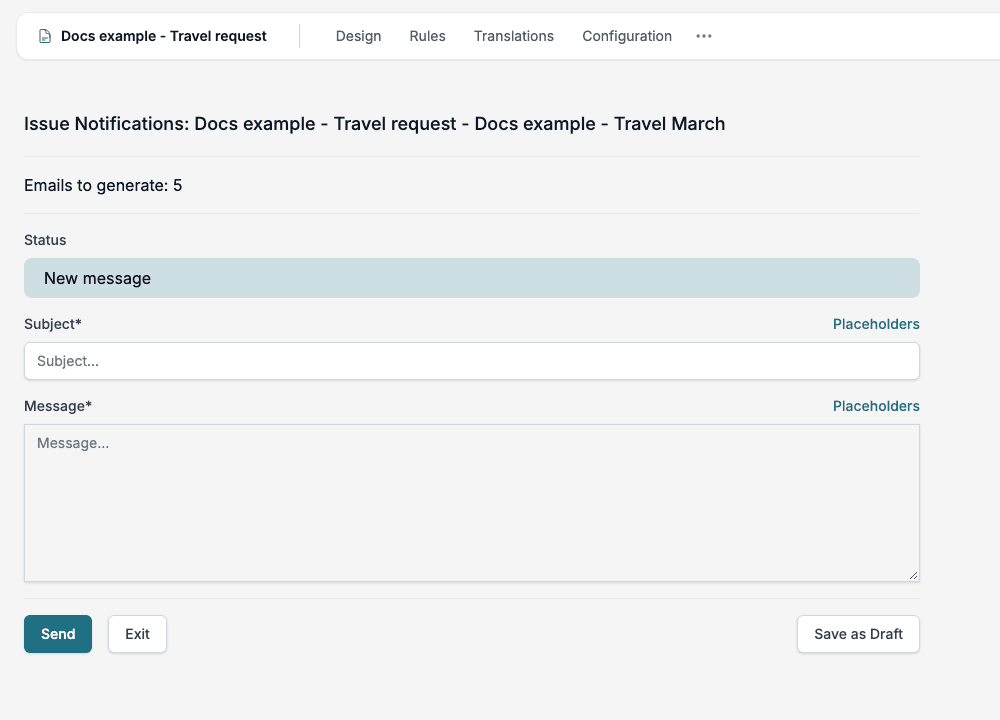
- Write a Subject and a Message. Click Placeholders to see the values from the loaded data that you can insert.
- Click Send to send the e-mail to every row with a valid address in the recipient column, or Save as Draft to come back later. Rows without a valid address get no e-mail.
📝 Note: Each recipient gets an e-mail with a link to their own form. Check the recipient column before you click Send.
When the e-mails are sent, the status of the data load is Issued and the date shows in the Emailed column.
The list of data loads
The page of each Smartform lists its data loads.
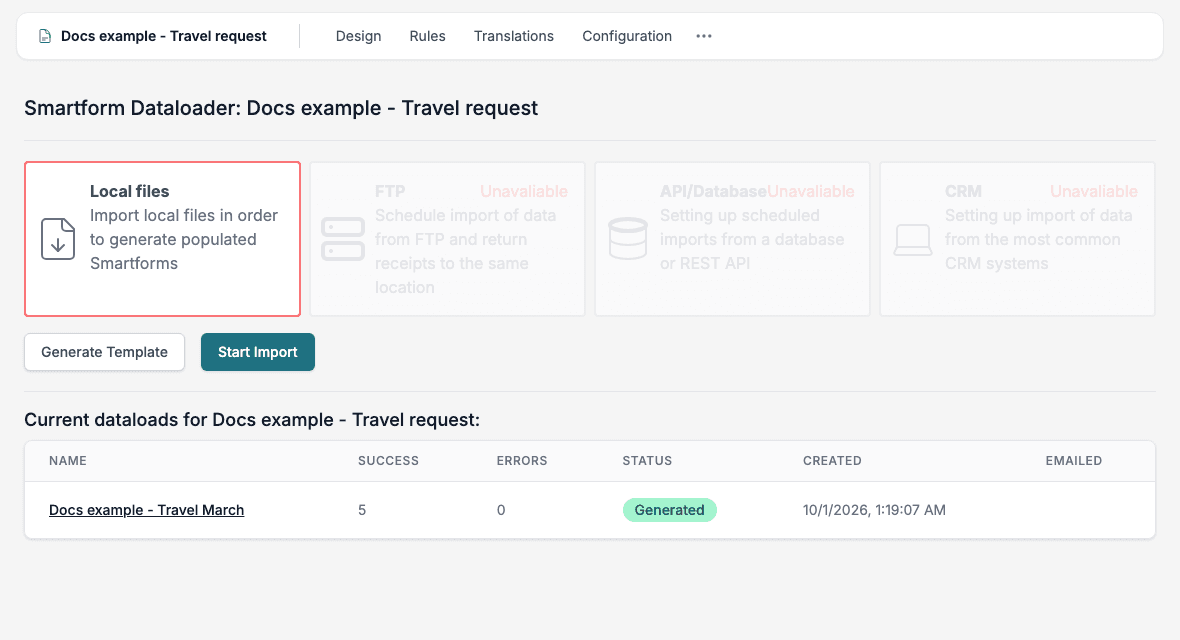
| Column | Meaning |
|---|---|
| Name | The Data Load Name. Click it to open the data load. |
| Success | The number of forms created. |
| Errors | The number of forms that could not be created. |
| Status | Imported, Generated or Issued. |
| Created | When the data load was made. |
| Emailed | When the e-mails were sent. |
FTP, API/Database and CRM are shown next to Local files, but they are marked unavailable and cannot be chosen.
Use the API
A data load can also be made through the API. Send the file as a multipart form with the fields file, dialogDefinitionId and dataLoadName:
https://api.smartforms.metaforce.net/DataLoad/validate/uploadchecks the file and returns the same result as Import details.https://api.smartforms.metaforce.net/DataLoad/uploadcreates the data load.https://api.smartforms.metaforce.net/DataLoad/generatestarts the creation of the forms. SenddialogDefinitionIdanddataLoadIdas JSON.
How to sign in to the API is described in Smartforms API.