Set Up the Doc Composer
A Doc Composer form needs a toolbar, a Smartform with the type Doc Composer, a field to write in and, if people should insert standard texts, public texts in the Text Library. This page goes through them in that order. See the Overview for how the parts fit together.
Creating and changing toolbars needs access to Templates in Studio.
1. Create a toolbar
A toolbar template decides which buttons people get above the form.
- In Studio, go to Templates → Toolbars. The screen is called Toolbars for Smartform.
- Click New Toolbar.
- Enter a Name.
- Untick the buttons people should not have. A new toolbar starts with all of them ticked.
- Click Save.
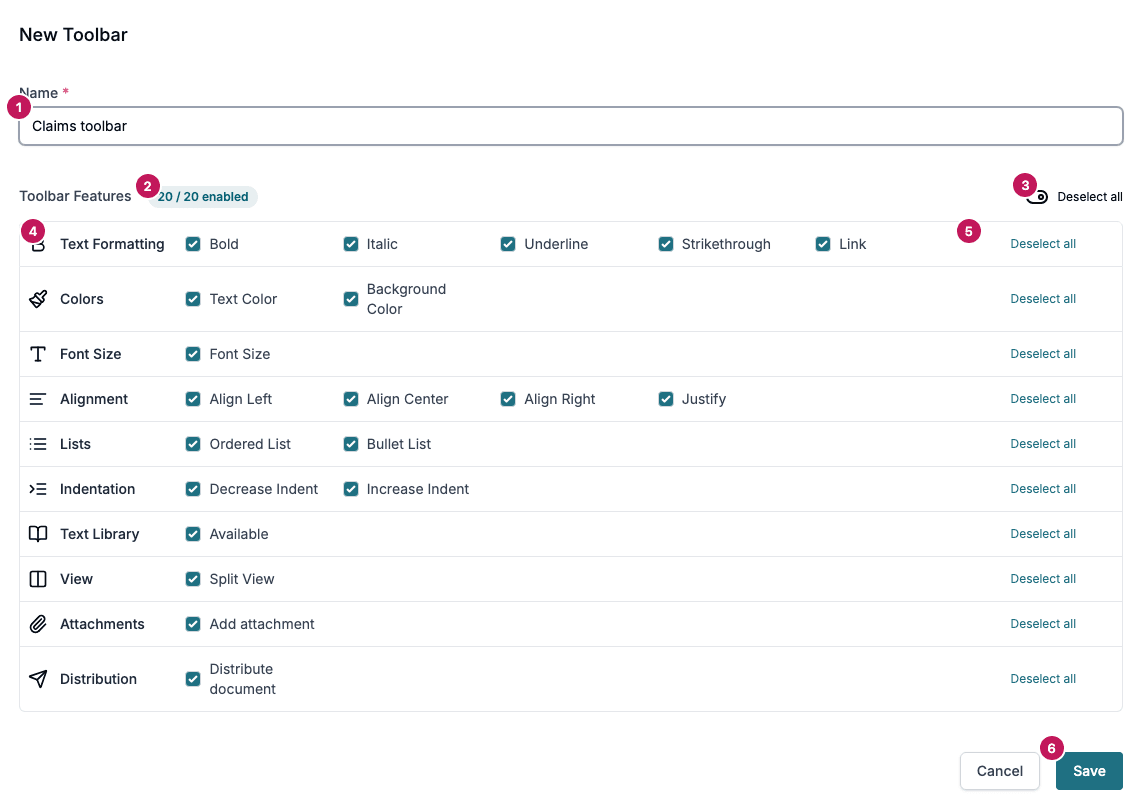
- Name: required. This is the name you pick on the Smartform later.
- N / 20 enabled: how many buttons are ticked.
- Select all / Deselect all for every group at once.
- A group of buttons. Tick a box to include that button.
- Select all / Deselect all for one group.
- Save creates the toolbar.
| Group | Tick | What people get |
|---|---|---|
| Text Formatting | Bold, Italic, Underline, Strikethrough, Link | The formatting buttons |
| Colors | Text Color, Background Color | Text colour and highlight colour |
| Font Size | Font Size | A menu for the text size |
| Alignment | Align Left, Align Center, Align Right, Justify | Paragraph alignment |
| Lists | Ordered List, Bullet List | Numbered and bulleted lists |
| Indentation | Decrease Indent, Increase Indent | Indenting list items |
| Text Library | Available | The Text Library button, to search for and insert texts |
| View | Split View | The Split Screen button, to see the PDF beside the form |
| Distribution | Distribute document | The send button: Submit, or Distribute document when the Smartform has a Distribution List |
The Text style menu at the start of the toolbar is always there.
The new toolbar is listed with the status Active. You can keep toolbars in folders: open the ⋯ menu on a toolbar and choose Move to folder.
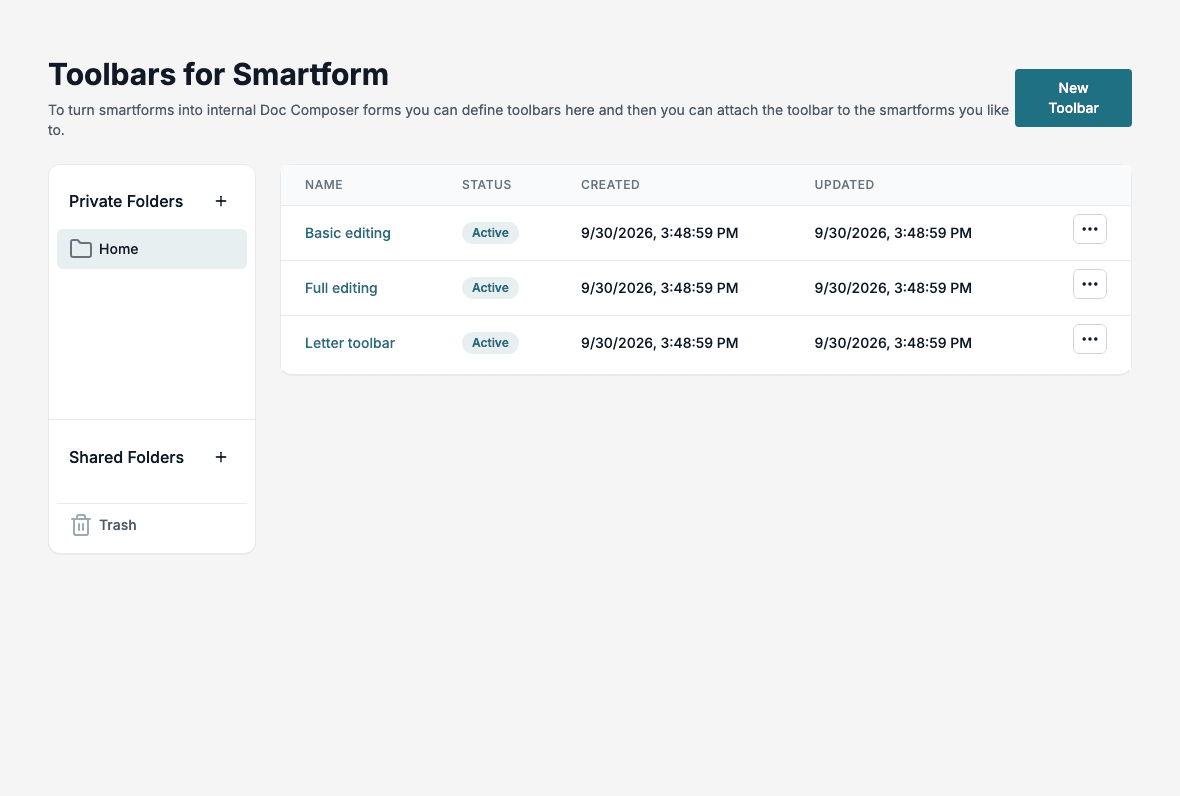
Change or retire a toolbar
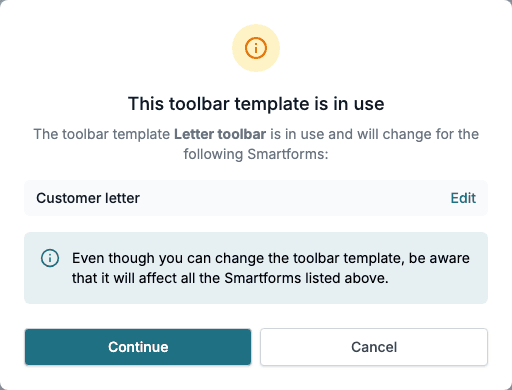
- To change a toolbar, click its name or choose Edit in the ⋯ menu. If Smartforms use it, Studio first shows This toolbar template is in use with the list of those Smartforms. Click Continue to edit it. The change applies to all the Smartforms in the list.
- To stop a toolbar from being chosen for more Smartforms, set Status to Inactive in the Edit Toolbar dialog. Only active toolbars are offered on a Smartform.
- You cannot delete a toolbar while a Smartform uses it. Studio lists the Smartforms that use it instead.
2. Make a Smartform a Doc Composer
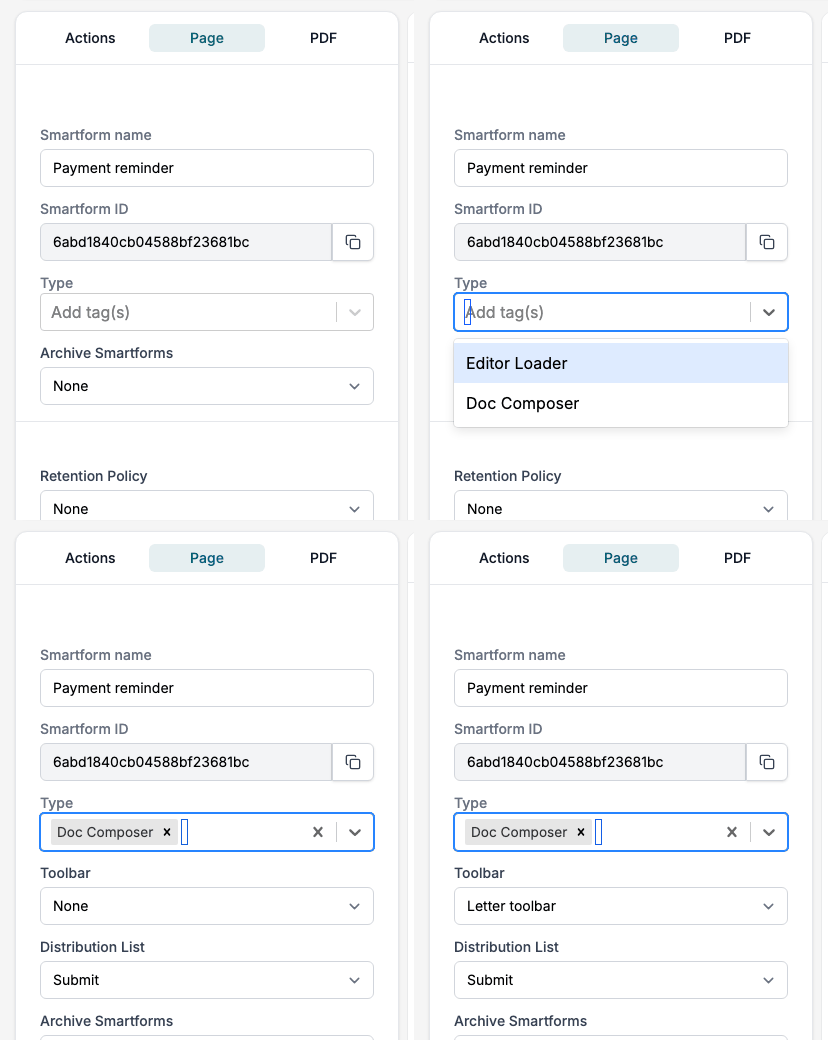
- Open the Smartform in the designer and select the Page tab in the left panel.
- In Type, choose Doc Composer. The fields Toolbar and Distribution List appear.
- In Toolbar, choose your toolbar. None gives people every button.
- In Distribution List, keep Submit if people should just submit the form, or choose a Distribution List if they should distribute it through a workflow. Only lists with the status Active are offered. To make one, see Distribution Lists.
Studio saves each change as you make it.
📝 Note: If you remove Doc Composer from Type later, the form opens without the toolbar, even though a toolbar is still selected.
3. Add a field to write in
People write in Rich Text fields.
- In the designer, add a Rich Text element from Items → Elements, or select one that is already there.
- On the Properties tab, tick Enable for user input.
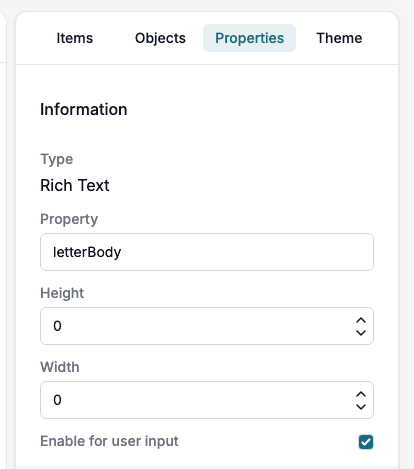
Without Enable for user input, the text of the element is shown but cannot be changed. People can also insert Text Library texts into ordinary text fields; there the text is inserted without formatting.
4. Offer Text Library texts
People can search the Text Library from the toolbar and insert texts. Only texts that meet all of these conditions are offered:
- Public is ticked on the text (Available in Doc Composer text search). See Texts and Folders.
- The text is in a shared folder with no access restrictions. Texts in private or restricted folders, and texts that are not in a folder, are not offered.
- If the Smartform has a Text Library folder, the text is in that folder or one of its subfolders. Without a Text Library folder, all shared, unrestricted folders of your company are searched.
- The text has the same type as the field the person is in: formatted texts for a Rich Text field, plain texts for an ordinary text field. When no field is selected, all types are offered.
A text that fails any of these checks is not offered.
To limit the search to one folder, set the Text Library folder on the Page tab. Choose Static and enter the folder code. The same setting is used for short references; see Using Texts.
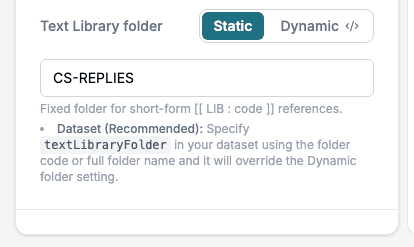
The toolbar must include Text Library (Available), or the Smartform must use None as its toolbar.
In Development the search offers the latest texts. In Test, Pre Production and Production it offers the version of the folder that has been published to that environment. See Environments.
5. Open a form
To try the Doc Composer, create a form from the designer:
- Select the Actions tab in the left panel and click Create Form.
- In the Create dialog window, choose the Environment and the Language. When the Smartform has datasets, you can also choose a Dataset.
- Click Create.
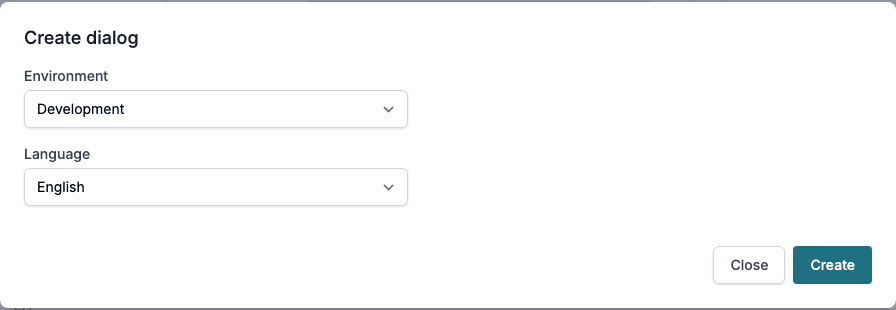
Studio activates the Smartform if needed and opens the new form in a new browser tab. For Development, it also publishes the Smartform first when it has unpublished changes.
Forms can also be created from your own system through the API. To open a form with the PDF already showing beside the text, add split=true to the form’s link. See Using the Doc Composer.