Smart Object Templates
A Smart Object describes the columns of a table: the name, type and options of each column. You define it once under Templates → Smart Objects and reuse it in the SmartTable element of as many Smartforms as you like. By creating Smart Objects, you keep tables consistent, speed up form building and avoid repetitive setup.
The Smart Objects screen
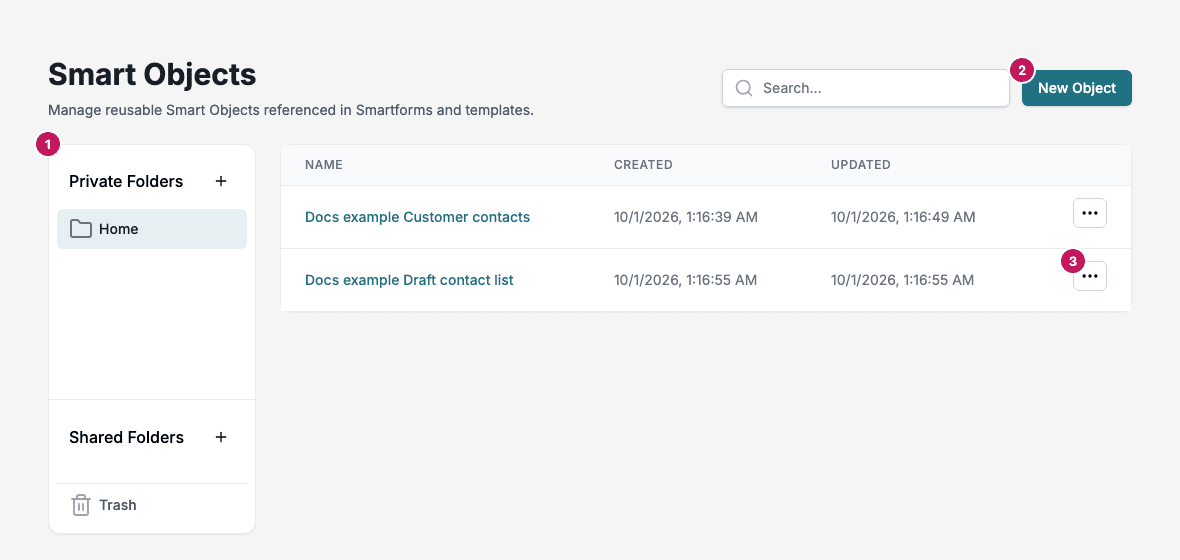
- The folder panel. Home shows only the Smart Objects you created. A shared folder shows every Smart Object in it. See Folders.
- New Object.
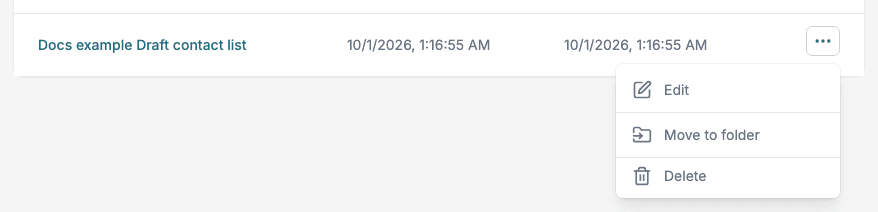
- The row menu with Edit, Move to folder and Delete. Use Search to find a Smart Object by name.
Creating a Smart Object
- Navigate to Templates → Smart Objects.
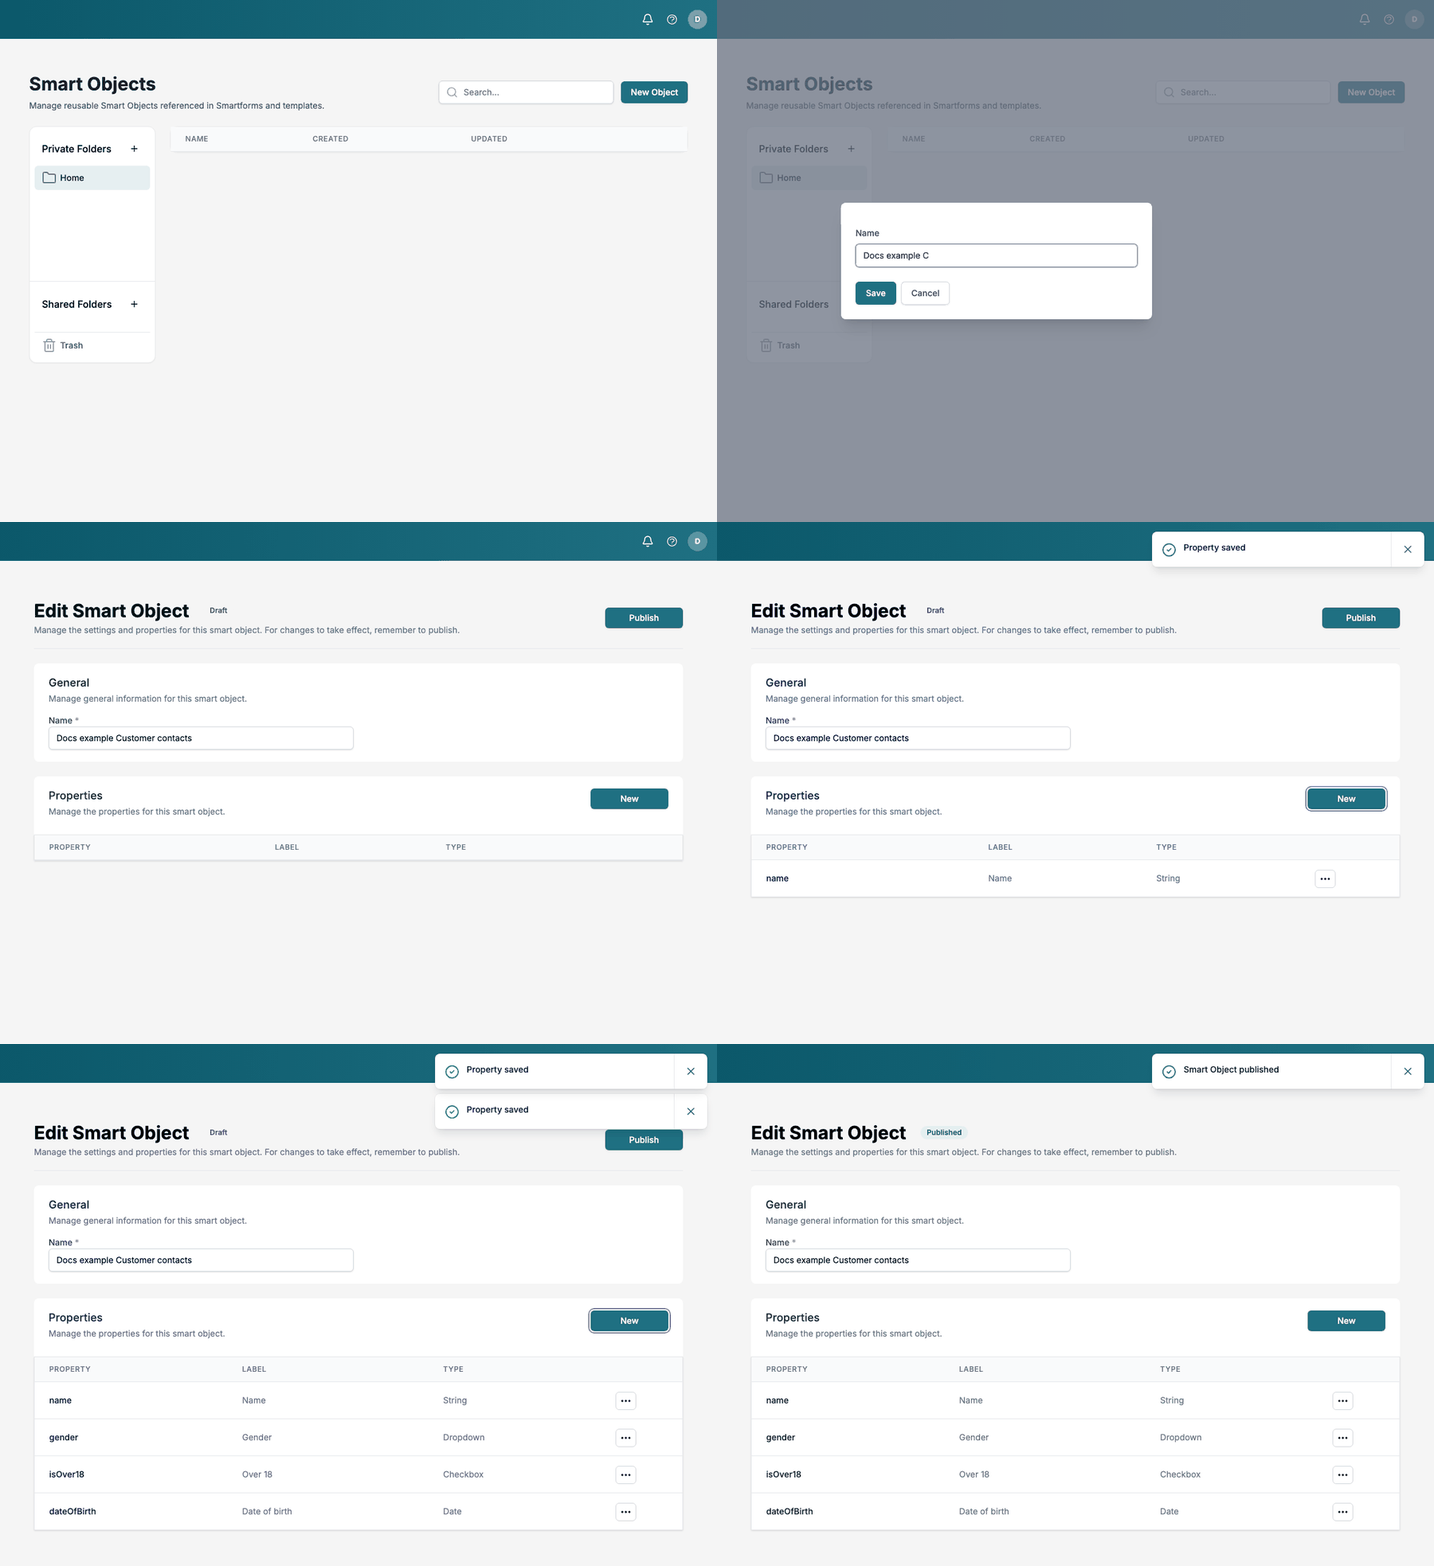
- Click New Object, enter a Name and click Save. The name can contain the letters A to Z, numbers and spaces. Symbols and letters such as æ, ø and å cannot be typed. Click Cancel to leave without creating it.
- The editor opens with the heading Edit Smart Object and the status Draft. You can change the Name under General at any time. It is saved as you type.
- Under Properties, click New to add a property.
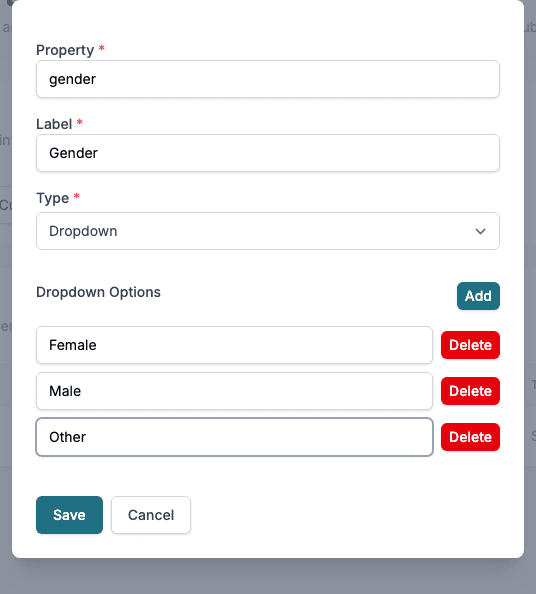
- Fill in the following fields:
- Property – The internal name of the field (used in logic and references). Like the name, it takes only the letters A to Z, numbers and spaces.
- Label – The display name shown to users in the SmartTable.
- Type – The input type for this property. Available options:
- Text – A single-line text field.
- Dropdown – A dropdown menu with selectable options. Click Add to add each choice, and Delete to remove one.
- Checkbox – A checkbox for true/false values.
- Date – A date picker.
- Click Save. Click Cancel to close the window without saving.
- Repeat the process to add as many properties as needed.
- Click Publish. The status changes to Published.
The editor shows:
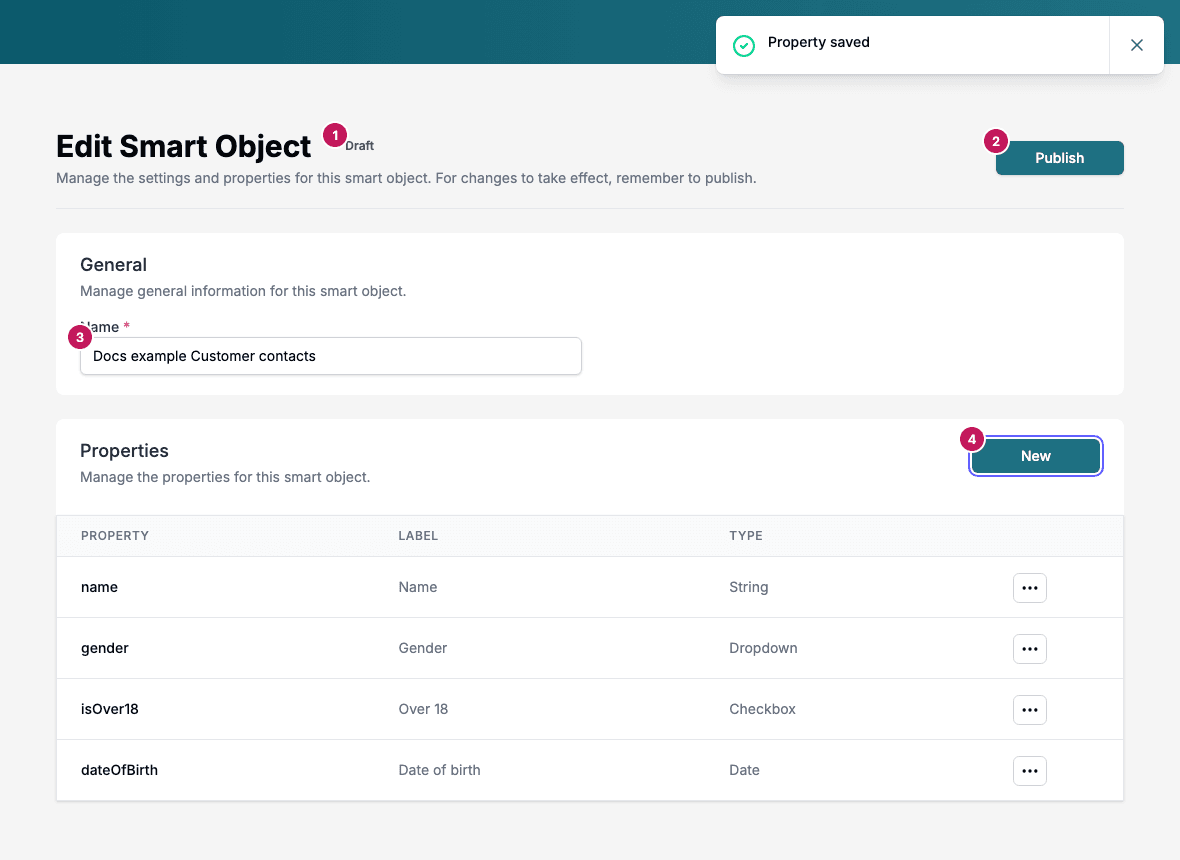
- The status, Draft until you publish.
- Publish. It is gone once the Smart Object is published.
- The Name under General.
- New, which adds a property. Each row of the Properties table has a menu for changing or deleting the property. The Type column shows String for a Text property.
The whole task looks like this:
💡 Tip: Keep your Property names short but descriptive, as they may be used in API responses and logic rules.
Only published Smart Objects can be chosen in a SmartTable. Publish the Smart Object before you use it.
Using a Smart Object in a SmartTable
Once you have published a Smart Object, you can use it inside a SmartTable element in your Smartform:
- Add a SmartTable element to your Smartform.
- In the Properties panel for the SmartTable, choose the Smart Object under Connected Smart Object.
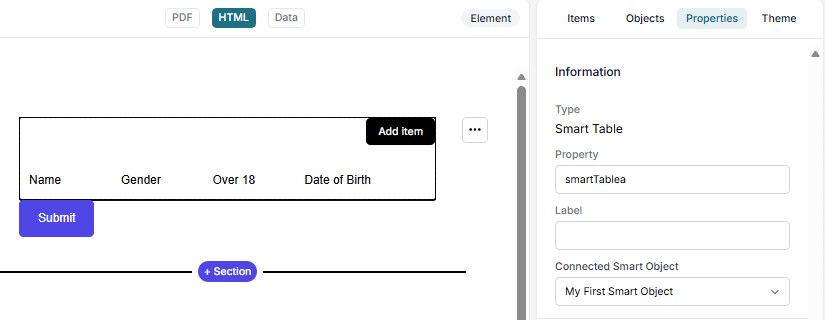
- The SmartTable now shows the Label of each property you defined as a column.
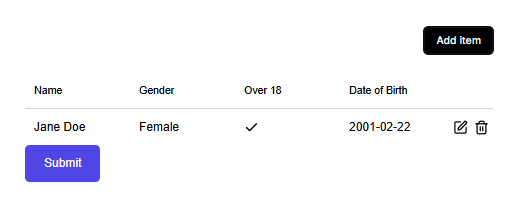
- People who fill in the Smartform click Add item and enter a value for each property in a row.
Changing a Smart Object that is in use
When you open a Smart Object that Smartforms use, Studio shows This smart object is in use with the Smartforms that use it. Click Continue to keep editing, or Cancel to go back to the list. Your changes reach every Smartform in the list.
Deleting a Smart Object
Click Delete in the row menu. Studio refuses with Cannot delete smart object while a SmartTable in any Smartform uses it, including a Smartform that has only been saved as a draft. The window lists the Smartforms with an Edit link. Remove the SmartTable from each one, or connect it to another Smart Object, then delete the Smart Object.