Embedded Integration
An Embedded integration gives a web page a button, a link or a QR code that creates a new copy of one Smartform in one environment. Each integration belongs to one Smartform and one environment. The button opens the new form in a new tab. The link and the QR code open it in the same tab.
Every host on this page follows the environment you pick here.
Create an integration
- Open the Smartform in Studio. Click More options (the three dots after the tabs) and choose Integration.
- In the Embedded section, click New.
- In the Create integration dialog, enter a Name.
- Choose an Environment: Development (the default), Test, Pre Production or Production.
- Click Create.
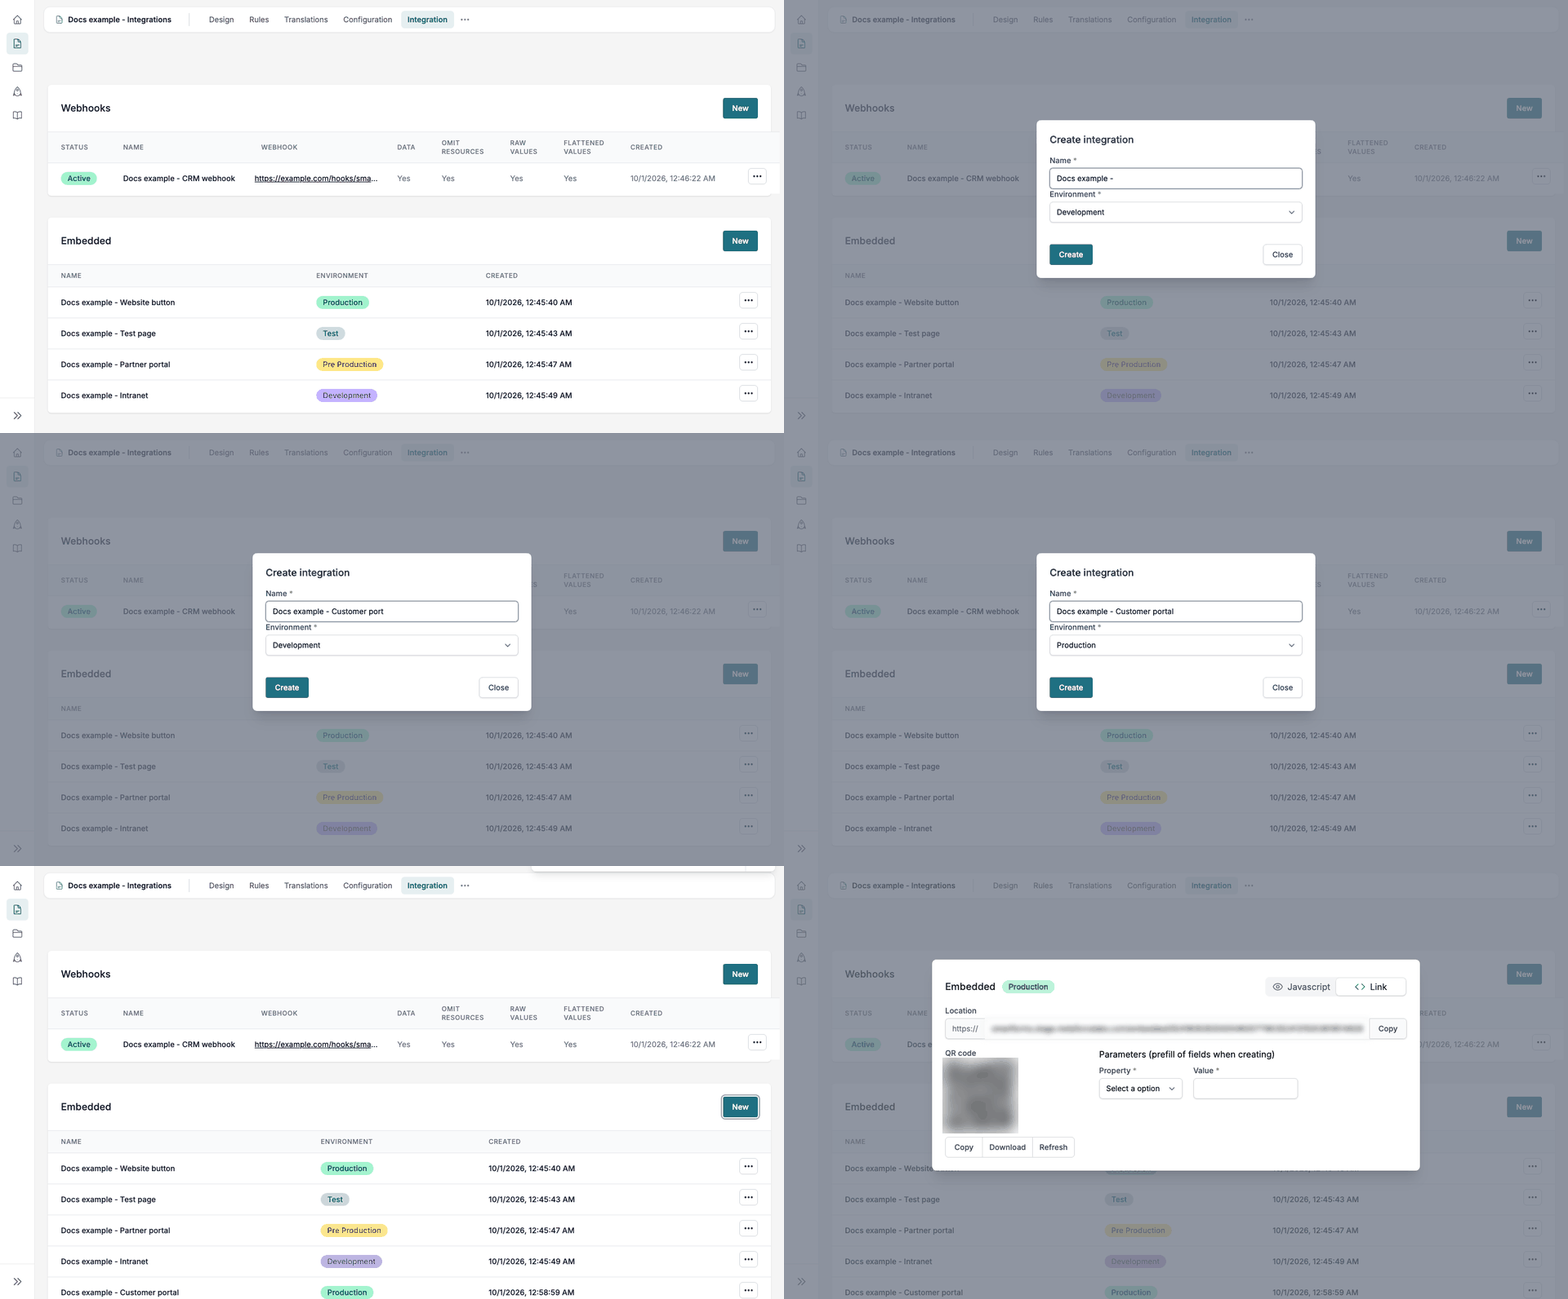
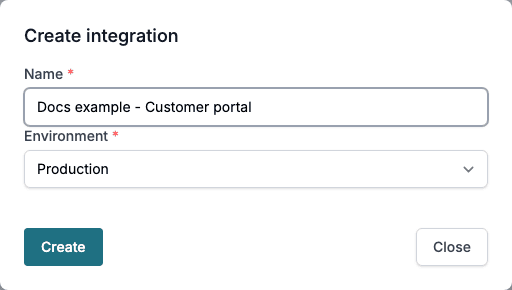
The environment is fixed when you create the integration. It cannot be edited. To use the same Smartform in two environments, create one integration for each. To change the environment of an integration, delete it and create a new one.
Forms created through an integration are filed under its environment and use the version of the Smartform published there. The Smartform must be published to that environment, see Publish Smartforms. If it is not, the reader sees Unable to find Smartform. Please try again later.
The list
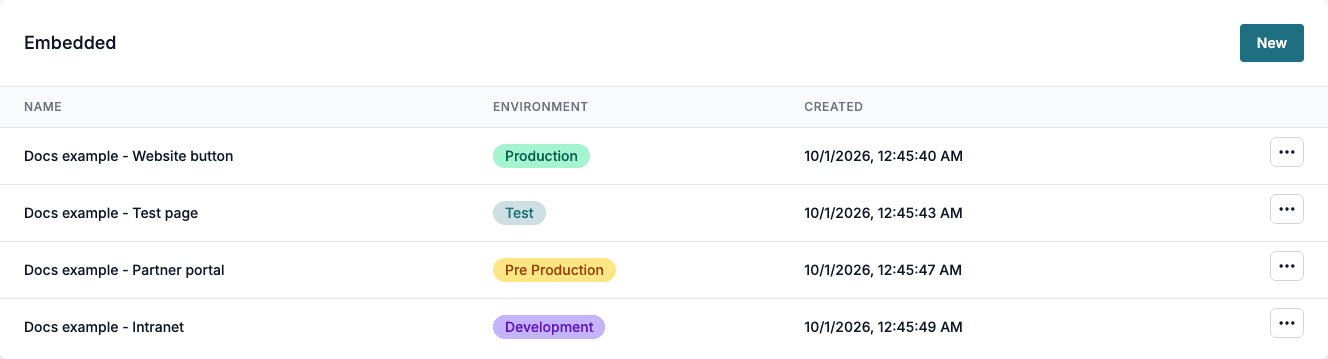
The list has the columns Name, Environment and Created. Click the ⋯ (three dots) menu on a row to choose View or Delete.
View an integration
View opens a dialog that names the environment of the integration. Choose between two views:
- Javascript: a button and a script to paste into your page. This view is shown first.
- Link: a direct address and a QR code.
Javascript
The script adds a Create form button that calls Doc Gen and opens the new form in a new tab. Studio writes the button id and the token into it for you. The version below shows the shape, with the host of the environment selected above.
<!-- Add this button. Feel free to style it, but make sure to have the correct ID -->
<input id="<button id>" type="button" value="Create form"/>

<!-- This will call Smartforms with a new button copy this at the bottom of the page -->
<script>
window.onload = (event) => {
  var element = document.getElementById("<button id>")
  element.addEventListener('click', function(e) {
    fetch('https://api.smartforms.metaforce.net/api/javascriptIntegrations/v1/dialogValues', {
      method: 'POST',
      headers: { 'Content-Type': 'application/json' },
      body: JSON.stringify({
        token: "<integration token>"
      })
    })
    .then(response => response.json())
    .then(data => window.open(data.url, "_blank"));
  });
};
</script>
📝 Note: The host in the snippet is the one of the Studio you are signed in to. The environment of the integration is set when you create it and is not part of the snippet. Copy the snippet from the same Studio that you want the button to call.
Link
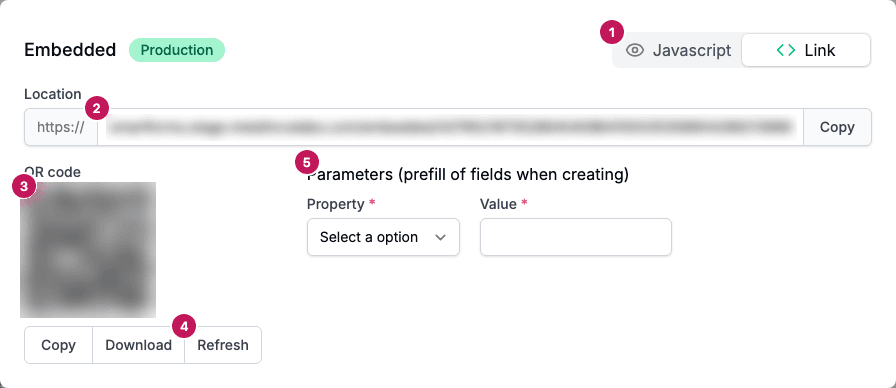
- Javascript and Link switch between the two views.
- Location is the address of the integration, with a Copy button. It has the form
https://smartforms.metaforce.net/embedded/{token}, where the token belongs to the integration. - QR code holds the same address. It is shown when the view opens.
- Copy and Download save the QR code. Refresh builds the address and the QR code again after you change the parameters.
- Parameters (prefill of fields when creating) sets starting values. Choose a Property of the Smartform, enter a Value, and use the plus icon to add another row or the trash icon to remove one.
After you change a parameter, Location and the QR code read <Please refresh> until you click Refresh. The address then ends with the parameters, for example ?Department=Sales. When a reader opens the address, the screen says Redirecting to Smartform and opens a new form with those fields filled in. Values added to the address by hand work the same way, as long as the name is the property of a field in the Smartform.
If the address cannot be used, the reader sees Unable to find Smartform. Please try again later. This happens when the token is not valid, and when the Smartform is not published to the environment of the integration.
Know when a form is submitted
If your page shows the form inside an iframe, the form tells your page when the reader submits it. The form sends the message smartforms:submitted to the parent window after a successful submit. The message holds:
| Field | Value |
|---|---|
type | smartforms:submitted |
payload.dialogDefinitionId | The id of the Smartform. |
payload.valuesKey | The id of the submitted form. |
payload.formName | The name of the Smartform. |
payload.submittedAt | The time of the submit, in ISO 8601 format. |
window.addEventListener('message', (event) => {
// Only trust messages from the form's own host.
if (event.origin !== 'https://smartforms.metaforce.net') return;
if (!event.data || event.data.type !== 'smartforms:submitted') return;

const { dialogDefinitionId, valuesKey, formName, submittedAt } = event.data.payload;
console.log('Submitted', formName, valuesKey, submittedAt);
});- The form sends the message to any origin, so your page must check
event.origin, as in the sample. - The message is sent only when the form runs inside a frame. It is not sent when the form is open in its own tab, and the generated Javascript snippet opens a new tab. Use the message when you show the form address in your own iframe.
- The message is sent after the submit has succeeded. It does not change the submit.
- To let your server know, use a webhook instead. The page message can be lost if the reader closes the page.
Related pages
- Webhooks sends the submitted data to your own address.
- Environments and languages in the API creates forms from your own system.
- Deployment explains the environments.